Friday, 16 December 2016

Quick and Easy Quilted Potholder

I recently took a trip to Pennsylvania for a friend's wedding. She lives smack-dab in Amish country, so every gift shop and market I visited was chock full of quilted crafts. Pot holders, pillows, reusable shopping bags, wall hangings and of course, some beautiful and amazing quilted blankets.

I decided I wanted to try a little bit of quilt-crafting myself, and since winter is upon us, I grabbed some holiday fabric from the Reuse Centre and got to work.


I started out trying to make a fancy star like I'd seen in so many Pennsylvania gift shops, but quickly realized I was in over my head! I started over with a simpler design of diagonal strips of patterned fabric, surrounded by a border of plain red.

This quick, easy project took so little fabric that I probably could have made at least five pot holders from the small rolls I picked up! I used my machine for most of the sewing, but this could easily be done by hand with a little patience.

Instead of purchasing quilt batting for the inside, I used two layers of leftover fleecy fabric that I already had in my fabric stash. The hanging loop is a scrap of ribbon cut out of the shoulder of a shirt, making this project 100% reused.


It doesn't quite rival the meticulously stitched works of art I saw stateside, but I'm pretty pleased with how my little potholder turned out. Maybe I'll even work my way up to fancy stars one of these days, too!

-Sarah (Volunteer)

All photographs provided by Sarah

Monday, 12 December 2016

DIY Reusable Magnetic Advent Calendar

In the fall I encountered an advent calendar that had been put out by a local retail store and it inspired me to make my own version. The tins on the original magnet calendar were pretty small, too small for the kinds of tasty treats I’d want in my own version.

Original Advent Calendar from local retail store

To create my calendar, I needed 24 small containers. I put out a call to my family, friends, and colleagues to give me all their small containers of lotions and potions for my project. I decided I wanted round containers, with a lid, approximately 6-8 cm (2-3”) across, I wasn’t fussy about what the container was made from. Once I had collected 24 containers I was ready to go!

My stock of small round containers

I peeled all the labels off of the containers, most of which came off very nicely with no residue left behind. I also needed to take out all of the liners from lids. I gave the containers and lids a good soak and wash in warm water and dish washing soap. The dish soap cut any oils and gunk left behind by the lotions, hair products, and whatever else had been in the containers.

Removing the foam liner from lids

I chose to use fabric to cover the containers, I had some small pieces in my stash that fit the winter/Christmas theme. To cover the lids, I traced a circle of each container lid on the fabric and cut it out. For the sake of ease and time I only covered the lids with fabric, it seemed like an extra hassle to also cover the sides of the containers. Of course you could also use paper, ribbon, or paint to decorate your containers and lids.

Tracing each lid on festive fabric

I borrowed some fancy paper cutting tools from a friend to cut out numbers and snowflakes from extra scrapbook paper I had kicking around. I contemplated painting on the numbers, but I’m not that great at painting fine details and I was worried I’d mess things up.

Numbers and embellishments I cut out for each lid

With my trusty Mod Podge and foam brush in hand, I coated the top of each lid generously and layered on each specific piece of fabric that I had traced and cut out. Once the fabric was on the top of the lid, I added a layer of  Mod Podge to the top of the fabric. I then added my numbers and embellishments to the wet Mod Podge, and added on more layer of Mod Podge and left everything to dry overnight.

Mod Podged lids with fabric, numbers and embellishments

To make a magnetic base for each container, I used magnetic tape. My goal was to put the calendar up on the fridge, or on the metal closet door in our hallway. You could also use a fancy cut piece of metal, a cookie sheet, or a magnetic whiteboard to display your calendar.

Magnetic strip on the the bottom of each container

Once I added the magnetic strip to each container, I filled each container with tasty treats! I went to the Lindt store and purchased small chocolates. I also bought a gift card to go in the final container for December 24th. When all the containers were filled, I had to play around with matching lids to containers, since I didn’t mark them before I started!

Filled containers and matching lids

I learned a few things along the way* that I may go back and change for the next time but overall I’m happy with how my DIY magnetic advent calendar turned out.


The final product!

Next year, I may alternate candy with interesting kinds of tea, love notes, or vouchers for homemade treats that can be redeemed throughout the upcoming year.

*Here are a few helpful tips that I learned that would make the process a little bit easier:

  • Rough up the glossier plastic lid surfaces with sandpaper
    • I had considered sanding the shiny plastic lids a little to rough up the surface and allow the glue to adhere better but decided against it. Unfortunately, the fabric didn't stick as well to some of the containers with glossier plastic.
  • Full magnet coverage on the bottom of each container
    • I initially cut medium pieces of magnetic tape for the bottom of each container, so that the magnet would fit across the middle of the container but not go out to the edges. This worked for some of the smaller containers, but not for the taller or bigger containers. The larger containers didn't stay up very well and needed more magnetic backing. If I could go back, I’d use a magnetic sheet and cut a circle to fit the whole bottom of each container. I might still do that before we use the calendar again next year.

Kat (Staff)

All images provided by Kat

Tuesday, 29 November 2016

Festive Holiday Events!

‘Tis the season for reuse crafting! As the holiday season approaches, it's important to be mindful of the amount of waste created over the holidays. With all the merry festivities comes a mountain of used wrapping paper and purchases of new items, which ends up creating a great amount of waste!

This year, let's try having a Waste-Less Holiday! Celebrate an eco-friendly holiday season by making an effort to decrease our waste before and after the holidays. Instead of buying new, why not head to the Reuse Centre to pick up an artificial tree and deck it out with some creative ornaments? Or, try upcycling Reuse Centre items and create some one of a kind gifts.

To get your creative holiday juices flowing, the Reuse Centre is hosting a number of festive crafting sessions and reuse workshops at the Reuse Centre to provide hands-on holiday reuse crafting. We hope that you will join in the holiday fun!

Free Drop-in Winter Crafting Session

Bring the family for this free crafting session where we will be creating snowmen by using reusable items. This is a great opportunity to get the children engaged with holiday crafting and to check out our holiday reuse ideas that you can make at home. The workshop room will be decorated in reuse Christmas cheer to get you in the holiday mood!

Date: Thursday, December 1st
Time: 4-7pm
Where: Reuse Centre Workshop Room
Ages: Children 5 years and up recommended, parent/guardian must stay to supervise 


Deck the Halls DIY (#586371) 

This special reuse workshop is just for adults! Cozy up to the DIY fireplace as we show you how to transform ordinary household items into festive home decor. Repurpose old lightbulbs to make hanging ornaments, craft a wine cork Christmas tree and try out some paper-free gift wrapping alternatives. All craft materials and some light refreshments (tea and cookies) provided.

Date: Thursday, December 8th
Time: 6:30-8:30pm
Where: Reuse Centre Workshop Room
Ages: Adult
Cost: $18

Register: through eReg or by calling 311 (course # 586371)


All I Want is a Waste-Less Crafty Christmas (#586370)


This reuse workshop is for the whole family. Make a frosty snowman light-up jar, a decorative holiday wreath and Christmas tree ornaments with puzzle pieces. While waiting for your project to dry, try playing one of our winter-themed games, and nibble on some tasty treats. All materials provided. Adult must register and attend with the child(ren) registered in the course.

Date: Saturday, December 10th
Time: 10am -noon
Where: Reuse Centre Workshop Room
Ages: 6 years - Adult
Cost: Child $8 / Adult $15

Register: through eReg or by calling 311 (course #586370)


Happy Holiday Crafting!


Friday, 4 November 2016

Reused Halloween at the Reuse Centre


Halloween has come and gone for another year. That means it's time to put away the costumes and decorations until next year. This year for Halloween, our blog team decided to focus on reuse for our costume ideas. We left the theme of reuse open to interpretation. Our ideas included borrowing an old Halloween costume from a friend or family member, purchasing a second-hand costume, wearing a Halloween costume from a previous year, and creating a new costume from reused or repurposed material. Here's our showcase of reused, repurposed, and upcycled Halloween costumes.

Sarah


I made this 1880s bustle skirt last year, entirely out of reused materials, though I confess I did buy the pattern new. The dark blue underskirt and white panel are both made from curtains, and the light blue over-skirt is made out of a tablecloth. I already had the lace edging in my sewing stash, from a long ago trip to the Reuse Centre!

The bustle pad (basically a pillow that you strap around your waist under your skirt) is made of an old pillowcase I already had. The blouse came straight from my closet. I reused the costume again this year, and given the time it took to make, you can bet I'll be looking for every excuse to wear it again!


Siao

Every year when I think about what I want to be for Halloween, I set a few rules: one is to incorporate my normal wardrobe and supplies at home, as much as possible; the second is to have a work-appropriate outfit.  Restrictions help breed creative solutions and I believe it has made my Halloween costumes thrifty with minimal waste. Here are a few costumes I've created:

Cap'n Crunch


Cruella de Vil

and this year, Olive Oyl


To create Olive Oyl, I safety-pinned a piece of yellow scrap ribbon on a black skirt and pinned cotton ribbon trims around the collar and sleeves of my red blouse. For my mate, Popeye, we taped yellow foam to a black polo shirt, cut up a red place mat for the collar, and borrowed a captain's hat and pipe.

Vanessa

I crafted this Rubik's Cube costume last year and wore it again this year. My goal for the costume was to only use materials that are available at the Reuse Centre. It was very simple to create. I cut off the bottom flaps and three of the top flaps of  an empty moving box and covered the box with black poster paper. I used scrap booking glue runners to hold the paper in place but any glue or tape will work. The colourful squares were made out of file folders! I measured and cut out 6-7 squares in each colour and glued them to the existing black paper. Then I just tied some yarn to the front flap and back of the box. Voilá, I had an affordable and unique Halloween costume made entirely out of reused materials!


We had fun thinking outside of the box creating our Halloween costumes and look forward to reusing them in future years. Do you have any reuse themed costume ideas? Share them in the comments section. 

All photos provided by volunteers and Reuse Centre staff

Vanessa (Staff)

Tuesday, 25 October 2016

October Reuse-It Item - Favourite DIY Halloween Decorations

With Halloween just under a week away, we thought that it's only fitting for this month's Reuse-it item to be our favourite DIY Halloween decorations. 

These DIY projects are easy to make and are great for all ages. Check out our favourite ideas and try some of these on your own, or with friends and family!

Vanessa


Pine cone bats are simple to make and are a great way to use up pine cones laying around your yard before winter starts. All you need is some felt, glue, paper, and googly eyes. Instructions can be found at Fireflies + Mud Pies.


Creating a monster door is a fun way to add lots of character to the exterior of your house, when you're short on time or have limited supplies. These doors use coloured paper, paper plates, tape, and party streamers. Find out more details on how to create a monster door at GoodtoKnow.


Sarah

These DIY jar lanterns from Adventure in a Box are gorgeous, and you don't need to be a great artist to make them! Crafters have the option of making their own designs, or using the printable ones from the website. This is a great all-ages craft that looks classy!


Tamara & Lana

Ghost jugs are a simple Halloween decoration that both adults and kids can create. Grab a few 4L empty milk jugs, draw faces on them using permanent markers, and then cut a hole in the back to insert a light. You can find the tutorial at eighteen 25.

A fun variation of this project is to print large letters on each jug to spell out a message or spooky phrase. Another alternative is to add a bit of colour by using coloured permanent markers or a string of coloured lights.


What's your favourite DIY Halloween decoration? Share your favourites in the comments section. Happy crafting!

Friday, 14 October 2016

Goblins and Ghosts and Picture Frames, Oh My!

I love the idea of holiday decorating, but I don't have a pinterest-perfect home. Cute knickknacks on tables and ornaments on shelves tend to get shoved aside in favour of functionality.

This is why I've decided to focus on seasonal decorating with picture frames! My walls are never littered with the empty coffee mugs, books, and cat toys that seem to plague all of the horizontal surfaces in my apartment. 

There are so many ways to use picture frames in your decor. Here are a few of my favourites for Halloween!

Halloween Floating Frames

I love how simple and easy these are! Any frame would be great for this project, with the help of a little bit of paint. The best part is that they'd be really easy to repaint and switch out with each season. 

This tutorial from g*rated uses window clings, but if you have frames that could take two pieces of glass, you could easily design and cut out your own shapes from black or patterned paper. 


DIY Ghost Face Picture Frames

These spooky ghost faces would be perfect for a Halloween party or haunted house! They're a bit more complicated than the window-cling frames above, but this turorial from eHow actually looks pretty easy. 


Boo Frames

These cute frames are easy to make, and a great way to use up bits and pieces of scrapbook or wrapping paper! See the tutorial at A Diamond in the Stuff.


DIY Framed Spiderwebs

Low on time and decorating energy? These quick, easy spiderwebs can be made in a frame of any shape, size, or colour. The tutorial from Twelve on Main uses wooden frames and a staple gun to attach the yarn, but hot glue (or regular glue and a bit of patience) would also do the trick on a metal or plastic frame. 


Halloween Wreath

I love the detail of this funky Halloween picture frame wreath from My Humble Home and Garden. With a little bit of hunting for the right materials, it would be very easy to create something similar.

If you like the idea, but want something with a bit more of a seasonal autumn theme, there are also lots of great picture frame wreath tutorials online!


-Sarah (Volunteer)

Wednesday, 17 August 2016

The Almost (Not Quite) $1 Backpack

"Back to School" season is on the horizon! I thought this would be the perfect time to share the backpack I made recently, trying to use entirely thrifted materials or things that I had on hand.

I found this fabric in a thrift store several months ago, and I kind of fell in love with the colours and kitschy print. Plus, it was a dollar. How could I go wrong with that?

Okay, so it's a little busy. It's going to be good though, I promise!
The whole big piece was pretty overwhelming, so I'd been sitting on it for a while, trying to figure out what to do with it. When I started taking transit to work and realized a backpack would come in handy, I knew this would be perfect. It's a nice, medium-weight canvas so I knew it would be sturdy enough to cart my things back and forth every day. 

I was even more excited when I realized I had the perfect accent fabrics in my stash. I have a pretty big swath of heavy, cream coloured canvas from helping my sister-in-law make a costume a while back. She'd also given me some green cotton that I knew would make the perfect lining. I even had the perfect zippers on hand, and a big, ornate, gold button for the flap closure that I found at the Reuse Centre.

How perfect is this?
I was well on track to making my $1 backpack!

Then I got ideas.

I thought the canvas was too light. I wanted a darker accent. I remembered that I had a box of brown fabric dye, also found at a thrift store. The dyed canvas came out perfectly. Still on track...

Nope, it's not dinner.
...except for the part where the fabric refused to stop leaching dye. I tried every trick I knew (salt bath, vinegar soak, endless rinsing). Nothing in my arsenal seemed to set the dye properly, so I reluctantly had to set this fabric aside. I didn't want to take the chance of it staining my clothes. I ended up purchasing some new brown canvas to use.

This was the first setback in my plan to only use thrifted materials or things I had on hand. My original intent was to make the backpack found in this tutorial from Aggelicat. If I'd continued with that plan, I could have finished with the supplies on hand.

Ideas struck again.

I really wanted my bag to have adjustable straps. I also loved the look of the grommets in this tutorial from sew4home.com. Both of those things required hardware: a set of grommets, two D-rings, and two sliders. If I'd had the time or the determination I could have thrifted those things, or repurposed hardware from worn-out bags. I caved, and bought them new (for shame!) I also bought some interfacing to give the bag a little more stiffness and structure. 

The finished project!
In the end, I pulled elements from both tutorials, and added some of my own. My bag turned out to be about 50-60% used or on-hand materials, and it's been a great help on my commute!

- Sarah (Volunteer)

All images provided by Sarah

Thursday, 21 July 2016

New Programs at the Reuse Centre!

Have you heard the exciting news?

The Reuse Centre is now offering group programs and birthday party programs. These offer a wonderful opportunity to learn more about how to reduce everyday waste through reusing, upcycling, DIY ideas, scavenger hunts, and eco-challenges. Each program includes a complimentary Reuse Centre Shopping Experience where your group can pick up items for future crafting.

Photo Credit: City of Edmonton

What Group Programs are Available?

Group Programs are an excellent option for community groups such as daycares, Girl Guides or Scouts, sports associations, seniors’ groups, youth groups, schools, or any other interested social group. Programs must be booked at least 3 weeks in advance and are available year round.

We offer 1.5 hour or 2 hour program options, and each program can accommodate up to 30 individuals. You can choose from the following themes:

DIY Kids | 6 - 11 yrs
DIY Youth & Adult | 12 yrs and up
Green City Challenge | 6 yrs and up

Why not brush up your upcycling skills and book a program today? Also, stay tuned for more information as we will be offering a few pre-registered workshops in the Fall.

Photo credit: City of Edmonton

What Birthday Party Programs are Available?


Want to celebrate your child's birthday at the Reuse Centre? Birthday Party Programs are available for ages 6 - 14 years. Go on a reuse crafting adventure or put on your detective hat to solve a waste mystery.

Birthday Party Programs are 2.5 hours in length which includes a 1.5 hour program and a 1 hour room rental for cake and presents. You can choose from the following themes:

Crafty Kids | 6-14 yrs
Reuse Detectives | 6-14 yrs

Book now to celebrate your child's birthday with us!


Photo credit: City of Edmonton


Did You Know We Also Offer Boardroom Rentals?

Need a place to host your next meeting, workshop, or small social gathering? The Reuse Centre’s boardroom offers an affordable, flexible space, and amenities to meet your needs, with space for up to 30 people. Discounts are available for non-profit organizations.

Booking Information
For more information, or to book a program or rental, visit our website
CALL 780-944-7424
EMAIL reusecentrebookings@edmonton.ca

Friday, 15 July 2016

A Glimpse of Reuse at The Works Art & Design Festival

Photo Credit: Siao

It was another expressive and musing year at North America's largest, free outdoor art and design festival. This year, from June 23 - July 5th, there were 55 exhibits across 29 venues within downtown Edmonton and throughout the city for the The Works Art & Design Festival. Although there were many brilliant and vast performances, design and art pieces at the festival, I wanted to give a nod to the reusers.

Right in Churchill square, Canopy by José Luis Torres brought reprieve from the beaming sunshine. This temporary installation was made of recycled and biodegradable materials. It is reminiscent of a stroll in a forest and was a wonderfully interactive piece where many Edmontonians walked through and took a break on the benches underneath. You can see large pieces of the recycled material he used in this installation. This is his second year exhibiting in Edmonton. Last year, he featured Mutations at Latitude 53 Contemporary Visual Culture.


Photo Credit: Siao

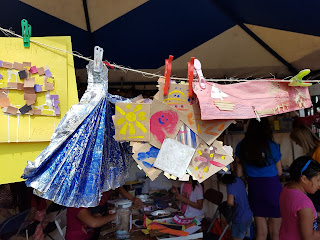
My favorite part of these festivals are always the crafting sessions and there were several stations located in City Hall and Churchill Square.  Drawing from all the different art forms found at the festival, kids of all ages were able to use those inspirations to make their own pieces. I am always awed by their creations and curious to find the next JosĂ© Luis Torres.

Photo Credit:Siao

In the midst of the festival, there were a lot of vendors on the food street and art market. One stall had a great collection of prints on dictionary pages. This could be a fun idea for your own project. Instead of dictionary pages, you could use old music sheets, encyclopedia pages, or telephone books.

Photo Credit: Siao

If you missed The Works Art & Design Festival, there are still many great art and craft events around Edmonton to check out:
Siao (Volunteer)


Tuesday, 5 July 2016

Reuse Centre's Emerald Award Success

Last month, the Reuse Centre received an Emerald Award from the Alberta Emerald Foundation, in the category of Government Institution. Emerald Awards recognize and celebrate outstanding environmental achievements and excellence across all sectors in Alberta.

Since opening in 2007, the Reuse Centre has diverted thousands of tonnes of reusable items from landfill and provided affordable items for reuse for individuals and organizations. We continue to see significant growth in the amount of items donated for reuse. In 2015, City of Edmonton residents and organizations donated 243 tonnes of items. That's an average of 20 tonnes per month, or more than 1 ETS bus. Processing and sorting all of these donations is no small feat! Our dedicated team of staff and volunteers sort through and organize all of these donations.


Reuse Centre staff and volunteers are thrilled and honoured to be recognized by the Alberta Emerald Foundation for our positive environmental impact. We look forward to continuing to divert more and more waste from landfill through reusing.

Thank you to all of our customers who purchase and donate items, and to our volunteer partner groups. We wouldn’t be where we are now without your support!


Tuesday, 28 June 2016

Canada Day DIY Ideas

Happy Canada Day! Why not celebrate Canada's 149th birthday this year by exercising your DIY skills? Create some holiday decor to celebrate the national holiday in style. Check out these simple reuse craft ideas to try out with your family!

Canada Day Wind Sock

A great backyard decoration that shows your pride for Canada! Upcycle a tin can and decorate with red and white paint, ribbon, and a maple leaf stencil. Add some old keys or cutlery to turn it into a patriotic wind chime. Learn how on Creative Mama on a Dime

Canada Day Jar Centerpiece

Make a statement on your table. Create a charming patriotic centerpiece by upcycling a mason jar! Don’t forget your red and white paint with a signature maple leaf on the front. Read more at Love Create Celebrate

Canada Day Bunting

You cannot decorate a party without some bunting! Try this Canada Day themed bunting using upcycled books. Add some flair by decorating with red and white buttons. Find out more at Simple As That Blog

Happy Canada Day Crafting!


Jenny (Staff)

Tuesday, 14 June 2016

Father's Day Gift Ideas

Father’s Day is right around the corner but don’t fret if you haven’t been able to find anything in the stores yet. Here are some great gifts that you can make by repurposing items laying around the house.

For the Dad that loves to garden: Floppy disk plant holders

These are very cute and are sure to brighten up any space! Floppy disks are a thing of the past now but it’s likely that many of you still have some lying around the house. These aren’t hard to make. Simply gather up as many floppy disks as you require (min. 5 for every planter) and a glue gun, then go plant shopping!

Full details on: BRIT + CO

For the Dad that loves winter: Handwarmers

While not in season at the moment, these will be very useful come winter. You can be creative making these! Use some fun patterned fabric, perhaps you have an old t-shirt that you love but it no longer fits, or an ultra-soft blanket that has a stain on it. You’ll need to cut out two, ¾ inch squares from your fabric of choice to make each handwarmer. Sew the two pieces of fabric together, fill with rice, and sew the handwarmer closed.

See detailed instructions here: Rae Ann Kelly

All you need to do is pop them in the microwave for 20 seconds before you’d like to use them! That’s it! A very practical and comforting gift.

Here’s a fun gift for kids to make: A Father’s Day trophy

The idea is to cut out a trophy shape from cardboard and decorate it with all sorts of fun things found around the house, such as dried pasta, sparkles, buttons, beads, plastic jewels, etc. Once the items are glued on and the glue is dry, the trophy can be spray painted gold for a nice finishing touch. Photos can be added afterwards too. 

Check out this blog for more details: Smart Class


Happy Crafting!

-Tamara (Volunteer)

Friday, 6 May 2016

May Reuse-It Item - VHS Tapes

May's Reuse-It Item is VHS tapes! We get a lot of them here at the Reuse Centre, and so many of our customers tell us that they'll be bringing their old VCRs out of retirement, after finding some of their favourite classics in the store.


Image source: Reuse Centre staff

With the advent of DVDs, Blu-Ray DVDs, and streaming services, many of us have old or unusable VHS tape collections. If you don't plan on watching them, what do you do with all of those old tapes? Our blogger team has taken up the challenge! We've pulled together a few of our favourite VHS upcycling ideas from around the web.

Siao

I am constantly running out of storage containers and space. Plastic VHS cases are great for organizing smaller items, and it's super easy to stack them onto a shelf. Make a small label for the spine of the case and you are set!  If the black cover bores you, you can have a small craft session with the kids to decorate the exterior.

Tamara

In this age of technology where new gadgets and systems are produced almost constantly, there's a high likelihood that you have some old VHS tapes that have become dust collectors. There's a number of things you can do with them so they don't just end up in the garbage. Take, for instance, this easy to make pen holder:
You only need 4 tapes, glue, and some sturdy cardboard. In fact, I wouldn't think you have to limit yourself to making just a pen holder with this idea! This container could also be used to store kitchen utensils (spatulas, wooden spoons, and the like), fake flowers, and probably a lot more. Put your creative hat on! 

Get the full instructions at Hipcycle.

Vanessa

A VHS coffee table would make a great addition to a family or rec room! It’s super easy to make, and is sure to be a conversation piece. Add a touch of nostalgia by using your favorite movies!

Get the tutorial at Instructables.

Sarah

I love this VHS tape pencil case idea! You could also use these for sorting and storing craft supplies, like buttons or bobbins of thread. Get the tutorial at Taylor Rae Luster Flights of Fancy.

Do you have a collection of old VHS tapes? Blow the dust off, and get creative! Share your ideas in the comments below!

Please note that the Reuse Centre only accepts commercially recorded VHS tapes, and blank tapes still in the packaging. Home recorded VHS tapes should be disposed in the garbage.

Thursday, 28 April 2016

Turn Them In and Win!

Spring has sprung! All around the city, Edmontonians are cleaning out closets, basements, and garages.

There are so many great places in Edmonton that accept unwanted items for reuse, including charities, second hand shops, and the Reuse Centre, of course!

But do you know what to do with items that aren't in good condition, or that aren't accepted for reuse?


The City of Edmonton is asking residents to take household hazardous waste and items too large for regular garbage collection to an Eco Station.

Eco Stations are convenient waste drop-off facilities for all types of residential waste and they play an essential role in Edmonton’s integrated waste management system.

Items such as old electronics, paint, batteries and cleaning products can be turned in for free at one of the City’s four Eco Stations where they will be recycled and disposed of properly. This type of waste is harmful to the environment if not handled correctly and should not go into the garbage.

Eco Stations also accept large and bulky items such as sofas, mattresses, tables and yard waste which cannot be set out for regular collection. Please note that fees will apply for these items.

To say thank you for disposing of your household waste properly, Eco Stations are giving away movie passes from April 25 to May 9. Visit an Eco Station for your daily chance to win.

For locations and more information please visit Edmonton.ca/EcoStations


Thursday, 10 March 2016

Post-Holiday Tissue Paper Crafting

Now that the holiday season is behind us, here is one way to minimize the household waste from everyone's favourite part of the holidays — the gift giving!

Tissue paper is a lovely addition to any present, but has few uses after everything has been unwrapped. One reuse idea is to use it for a lovely family arts and crafts session! All you need are scissors and glue, some warm water, a cup, your leftover tissue paper, a sheet of wax paper, and a paintbrush or sponge to make amazing artwork.

Directions

1. Cut your wax paper a little larger than you'd like your tissue paper art to be.
2. Dissolve the glue in warm water (I find that a ratio of 1:2 works well) in your cup.
3. Cut up your tissue paper into small pieces, to be glued onto the wax paper (squares or rectangles are a good shape to start with).
4. Sponge some glue mixture onto the wax paper in the area that you'd like to start placing your tissue paper.
5. Place tissue paper pieces onto the glue spots in the arrangement you'd like. Feel free to layer!
6. Pat down the tissue paper with your sponge, and make sure that you soak them through with the mixture.
7. Leave your art to dry.


8. Trim the wax paper edges down to the size that you want.


9. VOILA! Take a step back and look at your beautiful art piece! You can frame it, or place it somewhere that it will have light shining through, for a stained-glass look.


For an extra "Wow" factor, you can cut out some aluminum foil for a focal point, or add some glitter while the glue is still drying.

Happy crafting!

-Mallory (Volunteer)

All photos provided by Mallory

Monday, 29 February 2016

February Reuse-It Item: Pine Cones

Think it's time to put the pine cones away, now that the holidays are over and Spring is fast approaching?

Think again!

This month, our blogger team has put together a list of clever ideas to use pine cones, all year round.

Michelle

I typically use pine cones for crafts and decor. It's important to me to clean out the dirt and possible bugs that may be stuck in the crevices of the scales. Check out this straightforward tutorial from Urban Jane to learn how to clean out pine cones, so you don’t have to buy them from a craft store.


Sarah

Give your feathered friends a treat, and lure wildlife to your yard with this awesome, all-natural bird feeder made from a pine cone! This is a simple, quick activity that's great for all ages. Get the instructions at Happiness is Homemade.

And because I couldn't decide which one I liked better, I also wanted to share this artificial zinnia floral arrangement, from A Fanciful Twist.

Siao

Growing up in Edmonton and having great access to the Rockies, I have a natural affinity towards the mountains.  I'm always trying to find ways to recapture those moments of adventure and calm. What better way to evoke these strong emotions and memories than to use the good old olfactory sense? Using essential oils and collected pine cones, you can easily make scented decor pieces around the home. Learn how at Apartment Therapy.

Mallory

Pine cones are one of the most common things that we can find in our everyday surroundings here in Northern Alberta, but the biggest question is: 'What can you do with them?' One answer that isn't at the forefront of most minds is to use them to add texture to paintings! It's very easy to take them apart, sprinkle them onto a canvas with some glue, and paint over them to add texture to any painting — especially more abstract pieces, as pictured here.

Painting by Bradley Collins
Image supplied by Mallory

Do you have a great idea to share? Let us know in the comments.

Thursday, 28 January 2016

January Reuse-It Item: Board Games

Have you ever pulled out your favourite game, only to realize a critical piece is missing? Or maybe that well-loved board has fallen apart, and you suddenly have an excess of tiles and tokens.

Nobody could possibly want those, right?

Wrong! Here at the Reuse Centre, we take complete board games, but we also accept all kinds of spare chips, game boards, and cards. This month, our bloggers have put together some of their favourite ideas for reusing those extra bits and pieces.

Michelle

Here is a great way to repurpose an old metal Chinese checker board piece into a clock. You may find parts for the hands online or at watch shops. This would surely make a unique conversation piece for your home.

See the tutorial at Light & Spoon.


Mallory

Do the scattered pieces of old, unused board games litter your house? Do they lurk under couches and in corners, waiting for the chance to find their way under your feet so that they can have one last glorious moment of triumph as you limp away in pain?

Never fear, here is a wonderful tutorial from Living Like the Kings on how to re-purpose those pesky pieces into something a tad less dangerous for your unsuspecting feet. The best part? You can do this with any old board game pieces –  monopoly, clue, scrabble –  the sky is the limit!

Tamara

I saw an excellent idea for reusing old scrabble tiles: make some coasters! They're adorable, plus you get to play the game again and think of clever short words and/or phrases to put on your coasters. This is a great idea for making things like unique wedding favours or just to create a fun accessory for your table. Other than the tiles, you don't need much. All you need are some super glue, scissors, and cork or an old game board. Check out the details at Style & Elegance.

Sarah

These game-board shelves are genius! What a cute way to add a bit of colour and pattern to a room, without a lot of DIY effort. These would be great on any kid's wall, or as part of a household games room or family room.

Got any great ideas for using leftover board game pieces? We want to hear about them! Share with us in the comments.

Tuesday, 19 January 2016

Take a Tour of the Reuse Centre!

               
Did you know that the Reuse Centre offers tours?

A tour of the Reuse Centre is just one of many ways that we provide an opportunity for residents to learn about the idea and benefits of reuse. Tour participants learn a bit of history about the Reuse Centre, what kinds of items are accepted, and how materials are processed by staff and volunteers. Participants might also discover some new ideas about how to start reusing items at home!

Image Credit: City of Edmonton
Who can take a tour?

We offer tours to groups of 5 or more people, ages 6 and up.

Our most common visitors are schools and summer camps, but we've also hosted seniors' groups, businesses, and many different community and social groups.

Don't have a group? We'll be offering drop in tours during our Family Day Open House on Monday, February 15th, between noon and 3pm! Visit edmonton.ca/reusecentre or our Facebook page in February for more details.

When can we book a tour?

Tour bookings are 1 hour in length. They are available Tues-Fri mornings, starting at 9am (final start time for tours is 10:30am).

The tour itself takes about 30-45 minutes, and the group is welcome to shop for the remainder of their scheduled time. Tour participants shop at the regular rate of $5 for up to 50kg of items.

To learn more or to book a tour, please contact us:

CALL     780-495-9851