Showing posts with label Christmas. Show all posts

Tuesday, 26 December 2017

6 Recipes to "Reuse" your Holiday Dinner

One of the best parts about the holidays is all the gatherings and shared meals. I love a turkey dinner with all the fixings, but by the third day of turkey sandwiches for lunch after the holiday it gets a little old.

I hate to see good food go to waste so I make every effort to avoid throwing out my leftovers. Here are some quick and easy recipes to "reuse" those holiday leftovers.

Turkey Enchiladas
These healthy turkey enchiladas are a great way to use up leftover turkey while feeling like you're eating a brand new meal.

Check out the recipe at Creme de la Crumb.

Turkey Soup
The air is cold and the nights are long -- it's the perfect time of year to warm up with a hot bowl of soup.

Try Uproot Kitchen's turkey orzo soup, or for something a little heartier, creamy leftover turkey stew from The Goldilocks Kitchen.

Mashed Potato Puffs
I admit that I haven't tried these yet, but these mashed potato puffs from The Cooking Jar look absolutely amazing. I might just have to make some extra mashed potatoes to try them out!

These look like they'd also work really well with sweet potatoes, beets, or any other mashed root vegetable.

Mashed Potato Rolls
Potatoes and bread rolls -- honestly how could that be a bad thing? Num's the Word's mashed potato rolls are a little bit more work than most of the other recipes in this list, but they're worth it!

Hawaiian Fried Rice
You can't get much further from a cold and snowy winter day than sunny Hawaii. Toss rice, veggies, pineapple, and your leftover ham together for this "better than takeout" dish.

Get the recipe from The Recipe Critic.

Ham and Potato Cheddar Soup
Also from The Recipe Critic, this ham and potato cheddar soup will warm you from the inside out.

For a double leftover-busting whammy, you can substitute leftover roast potatoes or throw in any extra cooked veggies after you've cooked your soup.

What are your plans for finishing off those holiday leftovers? Share your favourite recipes in the comments!

- Sarah (Volunteer)

Friday, 16 December 2016

Quick and Easy Quilted Potholder

I recently took a trip to Pennsylvania for a friend's wedding. She lives smack-dab in Amish country, so every gift shop and market I visited was chock full of quilted crafts. Pot holders, pillows, reusable shopping bags, wall hangings and of course, some beautiful and amazing quilted blankets.

I decided I wanted to try a little bit of quilt-crafting myself, and since winter is upon us, I grabbed some holiday fabric from the Reuse Centre and got to work.


I started out trying to make a fancy star like I'd seen in so many Pennsylvania gift shops, but quickly realized I was in over my head! I started over with a simpler design of diagonal strips of patterned fabric, surrounded by a border of plain red.

This quick, easy project took so little fabric that I probably could have made at least five pot holders from the small rolls I picked up! I used my machine for most of the sewing, but this could easily be done by hand with a little patience.

Instead of purchasing quilt batting for the inside, I used two layers of leftover fleecy fabric that I already had in my fabric stash. The hanging loop is a scrap of ribbon cut out of the shoulder of a shirt, making this project 100% reused.


It doesn't quite rival the meticulously stitched works of art I saw stateside, but I'm pretty pleased with how my little potholder turned out. Maybe I'll even work my way up to fancy stars one of these days, too!

-Sarah (Volunteer)

All photographs provided by Sarah

Friday, 18 December 2015

Anything but Christmas Trees

Reuse-friendly Alternatives for a Different Kind of Christmas Tree

'Tis the season for retail marketing to challenge the concept of the traditional evergreen conifer tree. Why must they have all the fun?  Let's do our own mind exercise, and let's rethink and tinker.

In all its essence, the Christmas Tree is roughly triangular, conical, or pyramid shaped and it is meant to bring joy and cheer.  Simple!  This leaves so much opportunity to stretch our creative muscles and make our own beautiful, personal 'tree'.  Not everyone has the space or budget for a large tree, so this is also a nice reminder that there will always be a way to celebrate.

Before we run too wild, there are some key things to note. SAFETY FIRST!  Please make sure bulbs, lights and wires are not frayed and are rated for indoor use.  When designing your new festive tree, please consider fire hazards, weight distribution, load considerations, and the unpredictability/predictability of pets and kids.

You don't necessarily need to buy brand new supplies, but instead you can pull things from around the house to create a festive look and then return them back to their shelves after the holidays.  Consider giving some home staples a second purpose, rather than hiding your decorations away in a box for the rest of the year.  The Reuse Centre also has lots great supplies you could use.

Here are a few ideas I've come across:

- Siao (Volunteer)

Friday, 20 December 2013

It's a WRAP!

My supply box
Instead of spending a load of money on gift wrap, how about use common items around your home?  Here I will show you a few new ways to wrap presents for your family and friends this Christmas, using items you can find at the Reuse Centre or around your home.

Here is the list of the supplies I used:
  • Foam/decorative tape
  • Decorative paper
  • Scissors
  • Old shopping bags
  • Tissue paper
  • Brown/white paper
  • Used boxes
  • Old magazines
Double sided tape


Idea #1
Paint swatches make great gift tags.  You can also visit Rona, Home Depot or even Walmart to find them. I used paint swatches in shades of green and brown. I cut them up like Christmas trees. You can hole punch one end and add a ribbon or use a safety pin.  My friends were not surprised with my choice to use paint swatches as an element in gift wrapping since I have a thing for interior design!
My Christmas tree gift tags
Idea #2
I keep all of my shopping bags, especially the recyclable and paper ones to reuse. I like to add  a cute bow or gift tag to reuse them as gift bags. Here is what I have created:


To create the bow, I used five layers of tissue paper and a rubber band.  I folded the sheets back and fourth to create a strip and then tied it with the rubber band in the middle. I cut both ends kind of like petals. Put it on its side and start puffing the edges and pulling the layers of paper towards the middle. I then used double sided tape to attach it to the bag.


A pretty, bright bow!
The final product! 


Idea #3
A neat way to get kids to help out is if you ask them to paint onto plain paper, and then use that as wrapping paper. It is also a way to personalize a gift. Using my finger, I dotted different colours onto a large white piece of paper I found at the Reuse Centre. I doodled the wires on with a sharpie to create a Christmas light design.
Painted dots

Sharpie lines between dots

You almost don't want to open it!

I enjoy doodling so much that I created some other designs. It's a great way to personalize a gift for any season.


Idea #4
I use the pages from old books, maps and magazines like scrapbook paper. Another idea for using old magazines is that you can try a weaving design.  I did this by cutting out pages from magazines and then cutting them into strips. Begin to wrap more than one strips around the gift in one orientation. Next, take one strip and weave it over and under perpendicular to the strip that are already wrapped around the gift. It looks quite neat with more layers. As I was doing this I think I was purposely trying to make this gift difficult for my sister to open. Oops!

Supplies needed

Weaved gift wrap


Here are some other ideas that I found on the web that I did not get to try out.
  1. Newsprint flowers from Brit + co..
  2. How to make a gift bag from Craft and Creativity.
  3. Wrap Party from Design Love Fest.
  4. Cute DIY Gift Wrapping video from Michelle Phan.
These ideas and gift-wrapping techniques are great for any gift-giving occasion, not just Christmas.  Have you tried any? Comment or leave a picture on our Facebook page. I would love to see your creation!
-Michelle (Volunteer)

Tuesday, 17 December 2013

A Reuse Filled Christmas!

I love Christmas. Spending time with my family and friends means a lot to me. But as most of us know, the Christmas season is also a time of increased spending and waste production. But how much extra waste can actually come from one single day? I decided to do a bit of research, and found that in the two weeks after Christmas in 2012, the city of Edmonton collected 12 793 tonnes of waste and recyclables, compared to 5 666 the two weeks before. That’s over double the amount of waste! So I decided that this year I would try to reduce my impact on the environment, while also making creative and thoughtful presents and maybe even saving a buck or two.
I began my shopping (of course) at the Reuse Centre! What better way to reduce your impact than buying items that are in need of a second home? There I found all sorts of useful things, such as wine corks, frozen juice lids, Christmas cards, ribbon, puzzle pieces, paint and everything else I needed to make a list of meaningful Christmas gifts.
From here, I got to go nuts! Making your own Christmas presents means that the sky is the limit. You can go as far as your creativity is willing to take you! Here are a few ideas that I came up with:


This is a Christmas ornament is made from a frozen juice lid, a Christmas card, lace and sequins, all found at the Reuse Centre. I made a few different ones with different images, this one of a cardinal as well as Santa and a snowman. The craft was adapted from one I found on the Mrs.T's Christmas Kitchen blog.


This is a Christmas wreath made of a straw wreath frame, wine corks, ribbon and a bow. It was incredibly easy and great for the wine lover of the family! There's a step by step how-to instruction guide on the Save on Crafts blog.


This Christmas ornament is made from the other half of the card I used for the juice lid ornaments, puzzle pieces and paint. I made a craft like this as a kid, and I thought it would be nice to relive the memory! If you would like some direction, there is a nice tutorial on Lisa's Craft Blog.

These are just a few ideas of what you can do with the items found at the Reuse Centre, or any that you have saved for crafts. Next up are star shaped wall decorations made of magazines!
Not only did these gifts reduce my impact on the environment, but I have also spent a fraction of what I normally would on Christmas gifts (under $20 for all of these items and more!), and I have made presents that are unique and special to each one of my friends and family members. I am by no means an overly crafty or creative person, so if I can do this, anyone can! Where will your reuse filled Christmas take you?

- Leigh-Anna (Staff) is a program specialist for the City of Edmonton Waste Management Services and a Reuse Centre aficionado.


Monday, 9 December 2013

Recycled Advent Garland


Advent calendars made the countdown to the big day so special when I was little, each tantalising perforated door opening and the chocolatey goodness inside, just a little hint of the sugar induced mayhem that was to follow on Christmas day.

I still love Advent calendars today but now I prefer a much less sugary and waste free celebration of the countdown to Christmas for our family.

This is a calendar that can be used every year. It's made completely from either thrifted or Reuse Centre fabric and cardboard from cereal boxes. There are 24 little bags, each with an embroidered number, that have to be hung in order so putting it together is an event in itself!

Instead of chocolate, I slip a little gold ticket (reusable the following year) into each of the bags with a special seasonal treat to share with the family here are a few ideas:

* Have hot chocolate with marshmallows

* Christmas lights tour (A pyjama clad, chauffeur driven, tour of our local areas lights, complete with a sippy cup of warm milk, a blanket and a favourite toy to enjoy the ride)

* Make salt dough Christmas decorations

* Write a letter to Santa

* Popcorn and a Christmas movie

* Drink some hot apple cider (or for little ones, warm apple juice with cinnamon)

I like to think it adds something to our Christmas experience to have these little planned events to enjoy every day.

This was a simple sewing and paper project that can get the whole family involved, from choosing fabrics and sewing and embroidering the treat bags, to tracing and cutting stars to finally hanging 24 plump little bags. I popped some stuffing into each bag so they look a little more inviting.


Inspired to make your own?, it's never too late (just think, you are a year early for 2014 holiday season!)
Making a 3D 5 point star is easy using this free printable template, just print once, tape to card then use the card as a template for the other stars: Craft Ideas 5 point star template.

Make your own drawstring bags following this tutorial - Super Easy Drawstring Bag Tutorial  (Simply adjust the size as required).

If you have made your own reusable advent calendar or even a perpetual month by month calendar we would love to see it. Please share below!

- Emma (Volunteer)


Tuesday, 3 December 2013

Holiday Decor Galore at the Reuse Centre

This blog is going to take a distinctively holiday air in the next month. We will be posting holiday crafting ideas, highlighting the holiday items that you can get at the Reuse Centre, and sharing our tips on how to reduce waste at Christmas.

You may not know this, but the Reuse Centre is the holiday hub in Edmonton. We've got a huge stock of all things Christmasey.  You can find everything from decorations, to greeting cards, to the star for the top of your tree. Other items you can find include wrapping paper, gift bags, gift tags, decorations galore, bows, ribbon, artificial trees, and gifts.

We took a few pictures of some of the items that can be found at the Reuse Centre (*note that our stock changes constantly, and it's first come first served.). Scroll down and have a look at what we have to offer!


We have lots of new Christmas cards! 
Various decorations 
Stars for the top of your tree
Christmas tree decorations
We even have a few artificial trees up for grabs - but careful, they go fast!

Maybe you just want to curl up and read a book by the fireplace when the snow is swirling outside. Stock up on books, movies and music for the holidays at the Reuse Centre too.   

Lots of books for holiday reading!

Stay tuned for some great holiday posts coming up in the next few weeks. In the meantime, share your favourite way to Reuse during the holidays with us below, and we'll add it to our upcoming post on tips to reduce your waste during the holidays. 

- Hayley (Staff)

Friday, 11 January 2013

Furoshiki - The Reusable Wrap


If you're looking to cut down on waste and add a stylish 'twist' to your gifts for 2013 and beyond, then you need to get wise to Furoshiki.

This Japanese method of wrapping, folding and twisting your gifts in double sided fabric is the ultimate in reusable wrap, but it goes beyond gift wrap, a few knots and twists will mean your recipient can even wear their gift wrap as clothing, an accessory or even a baby sling,  take that one use paper wrap!


Just two 16'' squares of fabric sewn together, flipped right side out and topstitched will give a generous sized reusable wrap to be passed on, and on and on for the life of the fabric. Don't sew? think lightweight fabrics e.g vintage Headscarves, Last years Sarong. Bigger gifts? Thrifted tablecloths, the more decorative the better.

 Write the link to these these instructions on the gift card, or email/text so your friend can pass on the Furoshiki wrap to others. It's part of your gift to them, and regifting is encouraged.


Just for Christmas? think again, Easter gifts, Valentines, Birthday, if you're giving a gift then these techniques are a must for reducing waste and adding that extra special treatment to your present.

Fabric is always plentiful here at the Reuse Centre, so make a resolution you will actually keep, practice Furoshiki and help divert paper wrap from Edmontons waste.

- Emma (Volunteer)

Friday, 21 December 2012

Tutorial - Milk Bottle Top Ornaments


Crafting Christmas Decorations this season or looking for stocking fillers?

Pop in and pick up some supplies for these cute and seasonal decorations, shhhhh no-one will ever guess you started out with humble milk jug lids.

What you'll need:

Plastic Milk Bottle tops 
Small piece of stitched Aida Fabric/Embroidered fabric roughly 2.5''square across
Small lengths of Bias Tape/Ribbon/Piping/Decorative Trim
Hot Glue Gun
Felt
Scissors
Cardboard


1.Take your design and trim it up to approx 2.5'' making sure the design is centred.


2. Draw around your milk bottle top to make a cardboard template then cut just in side the lines, the card piece will need to fit inside the milk bottle top easily but not be too loose.


3. Put your template into the centre of your design and hot glue gun bit by bit the edges trying to keep to a rounded shape where possible, trim off excess where needed.


4. You should have something that looks like this, it's not perfectly circular but you can poke down the edges into the Milk bottle top so don't be too worried.

Next I'm going to show you several ways of disguising the ugly plastic milk bottle top, and yes I can see the irony of swapping red plastic for red felt. If you don't mind the plastic showing then that's fine just add a ton of hot glue to the inside of the Bottle top and carefully place your stitched piece inside, hot glue ribbon around the outside of the bottle top tie in a bow and you are ready to hang it. I personally don't like the look of plastic so here are some extra steps to gussy up your humble bottle top.


Method 1: Disguising your plastic edges with piping and felt.

1. With your design glued in place add piping to the outside of the bottle top making sure that the piped edge hangs over the plastic edge and hides it. Start glueing the piping at a slant, be careful of your fingers, it`s easy to burn yourself when pressing this down.


2. Keep rotating the piping until you get back to the beginning then cross the end over the start of the piping, cut the extra off and stick down, if it`s at a funny point then just stick a ribbon over the top :)


3. Next you`re going to want to hide the edges of the piping, the bit you aren`t supposed to see, do this by cutting a strip just wider and a little bit longer than the edge of your bottle top, stick down and overlap the ends.


4. Flip it over and add a loop of ribbon for hanging, glue down then cover the whole base of the bottle top in hot glue, stick down on a piece of co-ordinating felt then cut around it, don`t be too skimpy as you`ll want the edge and the bottom pieces of felt to meet.

That`s it you`re done, one mini hangable piece of stitchery.

Method 2 Disguising your plastic edges with Bias tape, Felt and Trim.

1. I`m using a single fold piece of Bias tape for this, here it is for those not quite sure what it looks like. You just need a piece long enough to stretch around the milk bottle top and join so this is great for those of us that keep every scrap of everything.

2. Add some hot glue to the inside rim of the bottle top then place the Bias tape over the edge, the edge of the top should fit snugly inside the fold of the Bias tape.


3. Continue around until the edge is covered with Bias tape adding hot glue as you go and ensuring the rim of the bottle top stays inside the folded edge of the Bias tape.


4. When you get to the end, over lap, cut off the excess then stick down.


5. The bias tape may not fit snugly when you turn it over, if this happens just hot glue gun a little to stick it down.


6. Glue in your stitched picture. Add a ribbon loop to hang and a felt circle to the bottom as before then get to decorating the outside edge. If you`re not happy about the joining of the Bias tape as before stick on a ribbon!


7. Start glueing your trim down, don`t cut off the excess til you have glued down the whole length, no-one wants a too short length (excuse my cheeky British double entendres!, blame it on a misspent youth reading Viz!)


Couple more ways of decorating/finishing off. Add the piping then wind round some bias tape to cover up the stitching on the piping, then add a little lace trim or another decorative ribbon scrap.

Finishing off

Add a ribbon loop to hang your mini works of art, or add a pin to the back to turn in to the worlds cutest brooch or add a magnet for the worlds cutest fridge magnet.


- Emma (Volunteer)


Tuesday, 18 December 2012

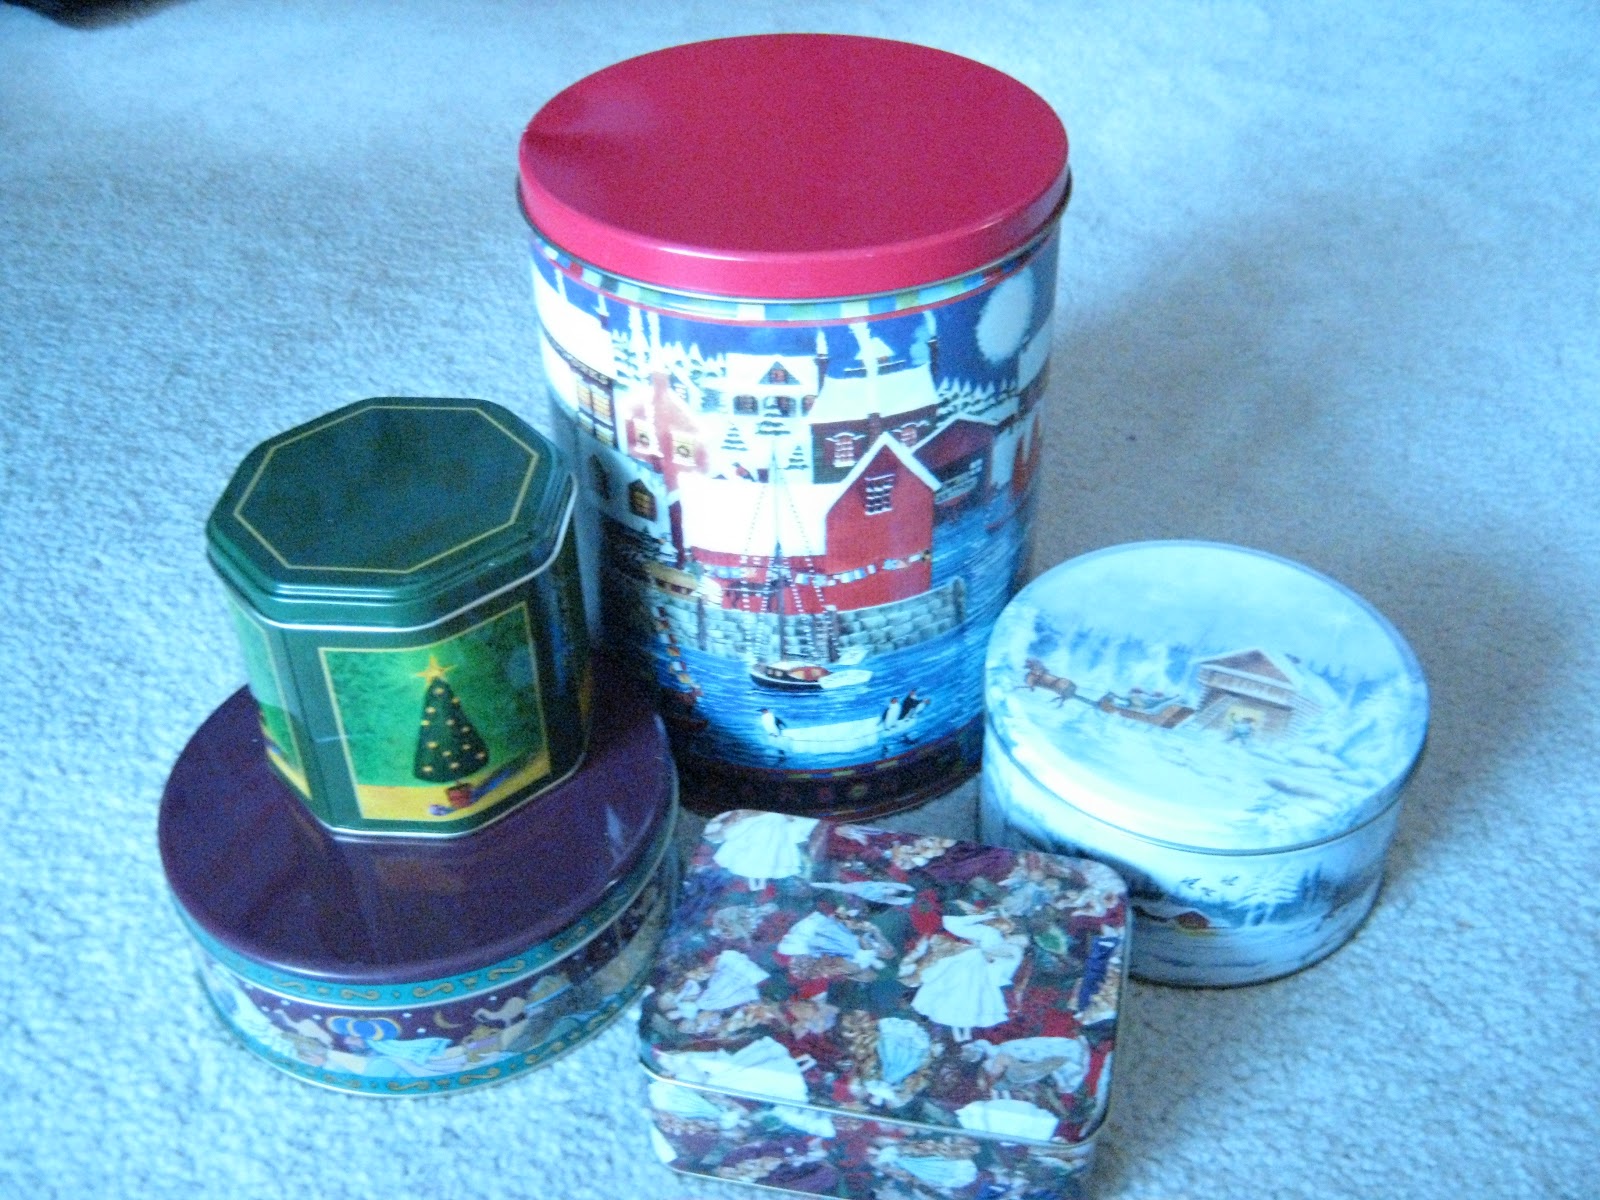
Seven Uses for Christmas Tins


Find a variety of Christmas Tins at the Reuse Centre!
Any regular at the Reuse Centre knows that we usually have an abundance of tins in all shapes and sizes. Now that Christmas is just around the corner, it's the perfect place to find a variety of holiday tins, so we've come up with a list of fun ways to get more use out of them.

1) Use as a decorative container to give away holiday baking - this one is a classic that is always appreciated! Alternatively, package small, "themed" items together in a tin instead of using a gift basket and cellophane.

2) Use holiday tins instead of gift bags; they look just as festive, but are quicker and less wasteful, as there's no need to stuff the top with tissue paper. Tins are also sturdier than bags, meaning you can use them again and again. A stick on bow or ribbon accent makes the package even more dressy.
Tins look lovely under the tree.


3) Instead of putting a pre-wrapped gift into a cardboard box, just wrap in parcel paper for a gift whose appearance won't be marred by the shipping process. Tins are sturdier than boxes, and often not much heavier.

4) Wrap a regular tin in Christmas paper to package those awkwardly shaped or easy-to-guess gifts, like stuffed toys or clothing.

                                                   
Squares and rectangles are easiest to wrap, and disguise the shape of the original package so that gifts stay surprises until the end.

 6) Use a nail and a hammer or a sturdy metal punch to poke a pattern of holes in a deep tin. Set a candle in the bottom and enjoy the way the light shines through. Try this tutorial with a Christmas tin, instead of a leftover can. Alternatively, try making candles directly inside of small tins for a decorative, easy to make gift.

7) Don't forget the post-holiday cleanup! Tins make great storage vessels for delicate ornaments and leftover cards. Try using a small tin with a secure lid to store your stray gift tags and a roll of tape for next year!


What are your favourite ways to reuse or re-purpose old Christmas tins? Share your ideas with us in the comments section!

- Sarah (Volunteer)