Showing posts with label Crafts for Kids. Show all posts

Thursday, 9 August 2018

Making Paper: A Kid-Friendly Crafting Activity

After a mad session of decluttering and office organization, what can you do with piles of shredded paper? Sure, you can recycle it, but as with anything, repurposing it can extend its useful life while creating something new (to you) and fresh.

An added bonus to making paper with a toddler is the messiness of it all. Kids get free range to go elbow-deep in a tub of gooey paper pulp, feeling the messy texture between their little fingers. It's a perfect afternoon activity.

Materials:
  • Shredded paper
  • Water
  • Wood frame
  • Screen material
  • Duct tape
  • Blender
  • Felt or similar material
  • Glitter, leaves, or any type of embellishment you'd like to add

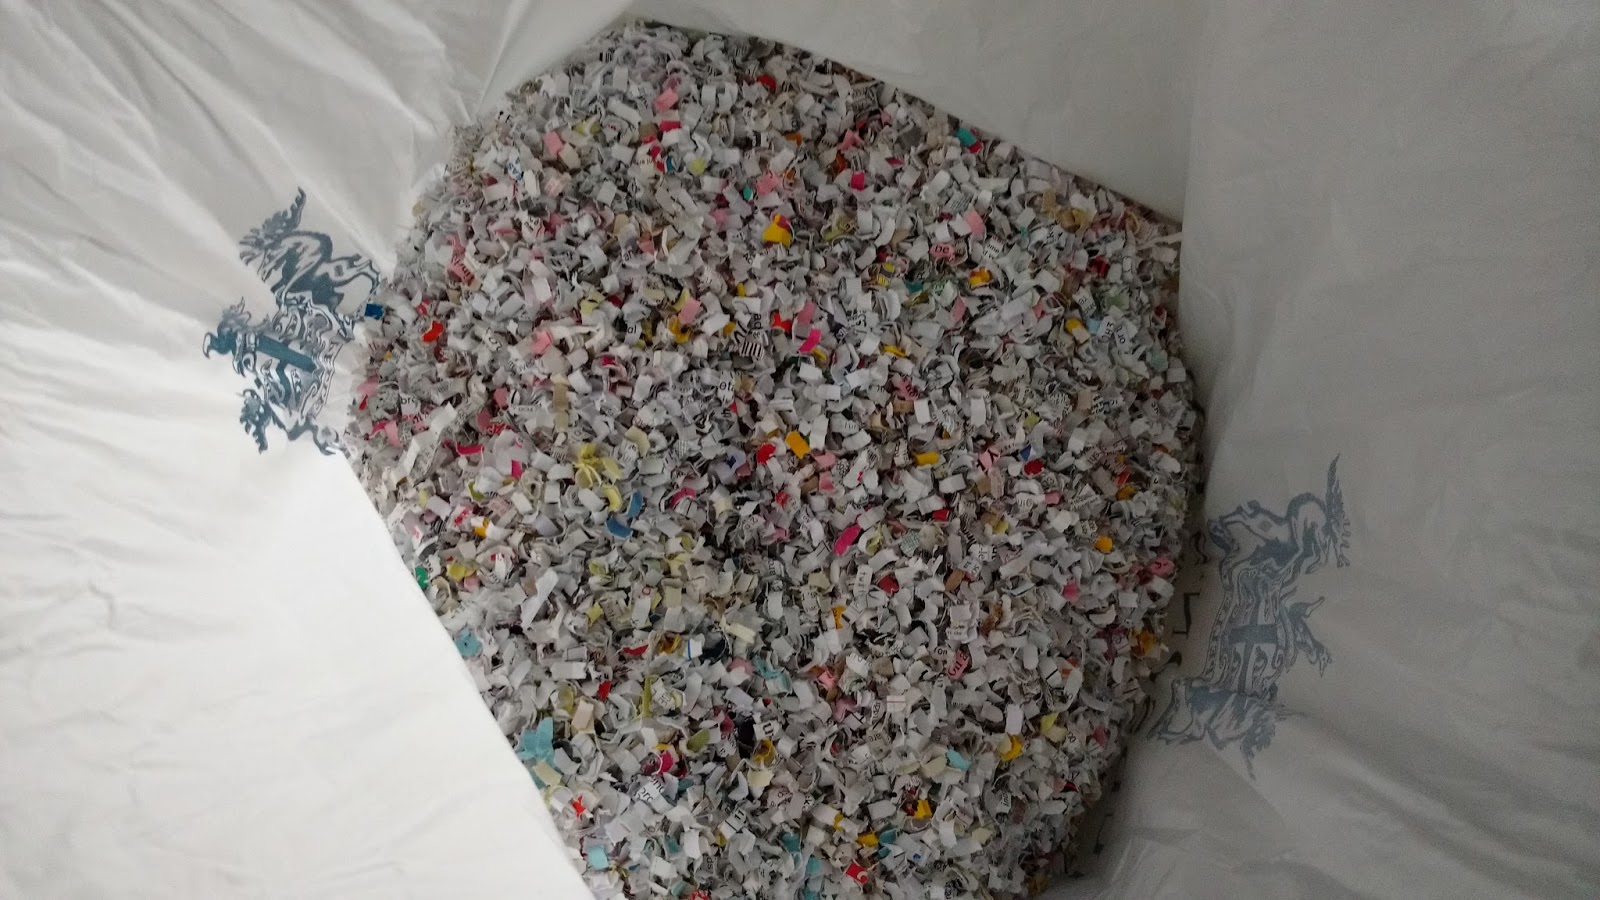
A big ol' bag of shredded office paper. Photo: Ellen Hanna
Start with a powerful blender or food processor and a few handfuls of shredded paper. Add any amount of water (you'll squeeze all the excess water out so you don't need to measure) and blend away!

Pulp A.K.A. goop. Photo: Ellen Hanna
Meanwhile, you'll need to create or repurpose a wood frame. I used an old painting canvas. I ripped the used canvas portion off (remember--you can use the painted or virgin canvas without the frame so don't toss it!) and duct taped some screen material to the frame. If you have a strong stapler or staple gun, you can use that. Try to source a very fine mesh screen or your paper will be chunky. Screening is usually sold in larger quantities than you need, so look for old material you can reuse for this.

Photo: Ellen Hanna
Photo: Ellen Hanna
Photo: Ellen Hanna
Depending on where you're doing this activity, you may need a bucket to catch the water that squeezes through the pulp. We were going to let the water drop into the grass but decided instead to press the pulp over our empty sensory bins.

Photo: Ellen Hanna
 Next, spoon, pour, or grab handfuls of goopy pulp and place on the screen of your frame. We tried a paintbrush to spread the pulp but found our little fingers were just as effective. Spread the pulp all the way to the edges of the screen. The thicker your layer of pulp is, the longer it will take to dry and you'll end up with a very thick, rigid  paper. If you want to embellish your paper with glitter, leaves or flower petals, or any other addition, now is the time.

Photo: Ellen Hanna 
A very thick layer of pulp. Photo: Ellen Hanna
Photo: Ellen Hanna
Once your pulp is in place, use a sheet of felt to squeeze the water out while smoothing out the surface. We first tried the leftover piece of canvas but the pulp stuck too much and was pulled up from the screen each time. If you don't have felt on hand you could try another type of fabric, like a towel or old piece of flannel.

Don't rush this step; the fun doesn't end with that squishy pulp! We tried rolling the pulp with a toy rolling pin and the wheels of a tiny truck (neither worked very well but were super fun to do).

A piece of felt can be reused over and over until it's soaking wet. Photo: Ellen Hanna
Ineffective but fun rolling pin. Photo: Ellen Hanna
Also ineffective toy truck wheels. Photo: Ellen Hanna


Once you've removed as much water as possible, gently peel the wet paper away from the screen using your felt as a transfer medium. Then gently peel the paper away from the felt. Since the wet paper can be difficult to relocate, consider a good place for your paper to dry where it won't get ripped or stepped on. Ours was very thick so it took days to dry out.

Pulp waiting to become a sheet of paper. Photo: Ellen Hanna
Once your paper has dried out, it's ready to be used. Ours was a nice chunky and stiff piece with lovely accents of colour--perfect for cards. We used one piece as a Thank You card for a friend and another as a Happy Birthday tag on a present. Next time, I'll add some seeds to the paper so that when we give the paper to friends with a gift, they can then plant it to grow some wildflowers.

Ellen (Volunteer)


Tuesday, 11 April 2017

Toddler Busy Board

As soon as baby becomes mobile, there’s a mad dash to secure all hazards in the house while providing safe options for play. Instead of breaking the bank with fancy toys, look around for sights, sounds, textures, smells, and tastes that are all around us.

Enter the "Busy Board." A busy board is a collection of repurposed household items that provide exploration and play for infants and toddlers. A quick google search shows several fantastic inspirations.

Busy Board Google Images Search
Busy Boards can range from simple to very complex projects depending on your construction expertise. They can be fixed to the wall or freestanding. Their fixtures can be permanent or evolving.

I’ll admit that my first attempt at this somewhat failed. When we moved from a tiny dwelling to a larger house that had an entire room dedicated to play, I was ecstatic to build the most amazing busy board wall. As it turns out, “amazing” just meant “huge.” While we did a great job of building the board, we somewhat fizzled at supplying a quality range of items to explore.

Image Source: Ellen
Cue second born child hitting the crawling stage. It’s time to reinvigorate our wall so that she can pull herself up and practice standing while exploring all the wonderful busy wall discoveries. This is the beauty of this project; it’s ever-evolving to suit the needs of your growing children!

Begin by deciding if your board will be small and portable or fixed to the wall. Since ours was installed on the wall, and since I wanted items to be installed in an ongoing manner, I needed to build the board out from the wall with a spacer of 2x4s. Thankfully, Grandpa was visiting and he took it upon himself to get the job started. Normally, we’d have an assortment of wood scraps kicking around to use but since we had just moved, we were fresh out. If you’re working from scraps, you may have less choice in size.

Once our base was installed, we simply began adding items as we found them. Our first stop was raiding our existing stash in the tool room. Next stop, The Reuse Centre! Since then, I’ve simply been adding items as they reveal themselves. It’s amazing to consider everyday household items destined for the trash in a brand new light!
Components of the board. Image Source: Ellen
Image Source: Ellen
My son is working on dressing/undressing himself so I added the button and zipper from an old pair of pants as well as the back pocket. He’s obsessed with the telephone and the calculator—both broken and destined for the trash! Our youngest uses the bottom half to pull herself up and explore the textures, sights, and sounds.

Is your kid a fan of texture? Maybe a budding musician who seeks out sounds? Or a future engineer intent on figuring out tasks of dexterity and skill? What items would your kid love to play with on a busy wall?


- Ellen (Volunteer)

Friday, 15 July 2016

A Glimpse of Reuse at The Works Art & Design Festival

Photo Credit: Siao

It was another expressive and musing year at North America's largest, free outdoor art and design festival. This year, from June 23 - July 5th, there were 55 exhibits across 29 venues within downtown Edmonton and throughout the city for the The Works Art & Design Festival. Although there were many brilliant and vast performances, design and art pieces at the festival, I wanted to give a nod to the reusers.

Right in Churchill square, Canopy by José Luis Torres brought reprieve from the beaming sunshine. This temporary installation was made of recycled and biodegradable materials. It is reminiscent of a stroll in a forest and was a wonderfully interactive piece where many Edmontonians walked through and took a break on the benches underneath. You can see large pieces of the recycled material he used in this installation. This is his second year exhibiting in Edmonton. Last year, he featured Mutations at Latitude 53 Contemporary Visual Culture.


Photo Credit: Siao

My favorite part of these festivals are always the crafting sessions and there were several stations located in City Hall and Churchill Square.  Drawing from all the different art forms found at the festival, kids of all ages were able to use those inspirations to make their own pieces. I am always awed by their creations and curious to find the next José Luis Torres.

Photo Credit:Siao

In the midst of the festival, there were a lot of vendors on the food street and art market. One stall had a great collection of prints on dictionary pages. This could be a fun idea for your own project. Instead of dictionary pages, you could use old music sheets, encyclopedia pages, or telephone books.

Photo Credit: Siao

If you missed The Works Art & Design Festival, there are still many great art and craft events around Edmonton to check out:
Siao (Volunteer)


Thursday, 10 March 2016

Post-Holiday Tissue Paper Crafting

Now that the holiday season is behind us, here is one way to minimize the household waste from everyone's favourite part of the holidays — the gift giving!

Tissue paper is a lovely addition to any present, but has few uses after everything has been unwrapped. One reuse idea is to use it for a lovely family arts and crafts session! All you need are scissors and glue, some warm water, a cup, your leftover tissue paper, a sheet of wax paper, and a paintbrush or sponge to make amazing artwork.

Directions

1. Cut your wax paper a little larger than you'd like your tissue paper art to be.
2. Dissolve the glue in warm water (I find that a ratio of 1:2 works well) in your cup.
3. Cut up your tissue paper into small pieces, to be glued onto the wax paper (squares or rectangles are a good shape to start with).
4. Sponge some glue mixture onto the wax paper in the area that you'd like to start placing your tissue paper.
5. Place tissue paper pieces onto the glue spots in the arrangement you'd like. Feel free to layer!
6. Pat down the tissue paper with your sponge, and make sure that you soak them through with the mixture.
7. Leave your art to dry.


8. Trim the wax paper edges down to the size that you want.


9. VOILA! Take a step back and look at your beautiful art piece! You can frame it, or place it somewhere that it will have light shining through, for a stained-glass look.


For an extra "Wow" factor, you can cut out some aluminum foil for a focal point, or add some glitter while the glue is still drying.

Happy crafting!

-Mallory (Volunteer)

All photos provided by Mallory

Tuesday, 16 June 2015

New Idea Cards Inspire Reuse Centre Customers

CD/DVD Picture Frame
You may often find yourself wondering exactly how some of the items at the Reuse Centre can be reused or repurposed. Luckily for our customers, the staff have come up with the solution of putting up idea cards throughout the store!
Customer curiosity was what motivated the Reuse Centre Coordinator, Kristin, to create idea cards and place them around the store.  People shopping or donating would often exclaim that they would have no idea what to do with things like bread bag tags or empty CD and DVD cases. Therefore, the idea cards seemed like an excellent way to reach out to the public and fulfill the Centre’s goal to educate people about a variety of creative and very useful ways to reuse different items.

Stamps Photo Frame
Idea cards are placed throughout the aisles and offer suggestions on a wide variety of crafts and DIY projects on how to reuse the items we sell. Each colorful card shows a picture example of the craft or project, with a list of materials and a link to a website with instructions or a tutorial.
So far, the staff have received positive feedback about the Idea Cards, and we have also noticed customers browsing through them while they shop. Even our younger customers love to take a look at fun crafts they can create with the items.


Paper Plate Dream Catcher
Given the positive responses from customers, staff are looking at using different methods to promote reuse of our items around the store. One idea we would like to try is a more prominent display of ideas on the wall for more people to see. Another exciting possibility is to compile and display a collection of submissions from the public on the projects they have completed with items from the Reuse Centre. 

Next time you visit, keep an eye out for the Idea Cards and be inspired to create something new with your next purchase of reuse items! Share the way you reuse our items below!

- Lynnette (Staff)

Tuesday, 9 September 2014

August Reuse-It Item: Paint Swatches

Anyone who's ever done a big painting project knows that it's easy to accumulate a ton of those paper swatches, fast! Ecru vs. Eggshell, and oh, this brand's Forest Green looks just a tad darker than that brand's Evergreen. Whether your project is big or small, it's important to get the colour just right, so those little swatches come in handy! There's no denying that they're useful, but what do you do with them after you've made your choices?

If you're like many Edmontonians, you bring them to the Reuse Centre! This month, our blog team has put together a list of our favourite ways to reuse paint swatches.


Michelle

Paint Swatch Collage

Using cut out circles of paint swatches, create a stunning effect of ombre colors. I have also seen triangle cut outs attached side by side.

Don’t forget to frame your art work!


Sarah

I always have a book on the go, (sometimes two or three at a time!) but I don't actually own any bookmarks. I resort to using receipts, scrap pieces of paper, and the torn-off ends of opened mail.

I really love this simple and cute idea for reusing paint swatches and personalizing them with permanent ink or paint. This a great all-ages craft and perfect for back-to-school.

Nichole

There are so many cool and beautiful ways that paint swatches can be repurposed that it makes me want to take a cloth bag to Home Depot and clean them out. For instance, while I've always thought that mosaics are an interesting way to tszuj up a table top, the idea of smashing up ceramics for it seemed messy and slightly dangerous. But this doesn't have to stop me anymore now that I've found this awesome idea for creating a mosaic look with paint swatches! Just secure the paint chips to the wood top and cover with a piece of glass, and you have a gorgeous work of art that you can tailor for any room.


Lana

While the pretty colours of paint swatches make them perfect to incorporate into parts of a scrapbook page or a handmade card, the paper is generally not acid-free or of archival quality.

"Hey Gorgeous", takes advantage of the perfectly matching colours and light weight to create a customized chandelier that's full of movement. Check out the tutorial here. The same technique can be used for a lampshade or a mobile.


Emma

Visit Poppytalk to see how this amazing feature wall was made over the course of a weekend!

Like cleaner lines and a little more order? Design Sponge also has a great example of a paint chip wall

Or if you don't have half of Home Depot's supply of paint chips, a handy dandy calendar, could totally be made from a Reuse Centre picture frame!

Visit DIY Projects for instructions on how to make this cute, custom calendar.


Do you have a great idea that we missed? Add your paint-swatch reuse ideas in the comments below!

Wednesday, 14 August 2013

Summer Fun for Kids - or How Avocados Taught my Son to Sew


Looking for some quick, easy summer fun this month? Counting down the days until the little ones are more gainfully employed during the weekdays?

Go straight to the Reuse Centre, do not pass go, do not collect $200. This is the place, for child (and pocket) friendly crafty ideas with a recycled agenda so turn up, get stuck in, then chill out.

Today's genius idea? Teach your children to sew.

It's fair to say that I'm more than a little craft obsessed, and this obsession seems to have rubbed off on the smalls of the house.  With in-progress crafty projects in every room, I'm not the least bit surprised when my 18 month old daughter picks up a crochet hook and starts wiggling it in a ball of wool, or my 4 year old son demands to be taught to sew. Since necessity is the mother of invention, this mother got to inventing an easy sewing lesson with items from around my craft room ( almost all available at the Reuse Centre)

So how do you get started?

Grab some yarn scraps (even string will do)
Embroidery Hoop
Onion Bag/Avocado Bag/Orange Bag (anything net like)
Yarn needle or just holding the yarn between finger and thumb to get them started.

1. Pop the net over the bottom piece of the embroidery hoop, pop the top piece over and tighten as necessary to make the net fairly tight. Cut around the hoop leaving at least an inch all the way around the hoop.


2. Thread the yarn or string through the yarn needle, or for younger children holding the string or yarn between finger and thumb should work perfectly well and with no potential for poking themselves.

My son had never sewn before and with little or no instruction he got to work weaving the yarn through the holes.


It's safe to say that I won't be winning any awards for his finished article, but he learnt something new, he polished up on his fine motor skills and hand-eye co-ordination, and he had fun.

Since the yarn can be pulled out again and again, even this reuse-item craft is reusable.

Got some crafty ideas to keep children entertained over the summer holidays? Drop us a line or get in touch on  FB

- Emma (Volunteer)