Showing posts with label zero waste. Show all posts

Thursday, 16 August 2018

How to Throw a Waste-Free Party

Summer is full of weekend get togethers and backyard barbeques. All these parties can create a lot of excess waste and garbage. But it doesn’t have to be that way. There are many ways to reduce or eliminate waste at your next summer party. Here are some tips.

Use reusable plates, cutlery and napkins 
    • While disposable dinnerware may be tempting to use for convenience, it creates a lot of extra garbage. Most of these items are plastic, Styrofoam, or coated with a water-resistant finish so they are not recyclable. If you must use disposable items try to find ones that are labelled as Certified Compostable
    • An easy alternative to disposable plates, cups, and cutlery is to use your own dishes and flatware. What’s that? You don’t have enough? Ask your guests to bring some. Having an assortment of dishes creates an eclectic fun atmosphere for the party. 
    • Along the same idea of using reusable dinnerware, the same applies to drinkware. Skip cans and bottles for beverages and serve drinks from pitchers or jugs. This will prevent having to recycle empty bottles and cans. It will also allow guests to have as much or as little water/juice as they want; they aren’t stuck with finishing the entire bottle or can or having to dump out the leftovers. Remember to use reusable cups and glasses too! 
    • Worried about washing all those dishes? Most of the individual plates, glasses, and cutlery can go in the dishwasher. That just leaves the serving dishes, which will have to be washed by hand. This is not such a terrible thing! Recruit a couple of your guests to stay later and help. This is a great opportunity to reflect on the party and have one-on-one conversations with guests that you may not have had a chance to chat with earlier. 
Ask guests to RSVP and confirm numbers
    • Knowing how many people to expect is important in determining how much food and beverage is needed and reduces the amount of leftovers after the party. Whether you send out a formal invite or a casual instant message, try to get an accurate number of the guests you are expecting. 
    • For quantity planning, check out the spruce for tips on planning quantities of food needed.
Have guests bring reusable containers for leftovers, or try a potluck, instead
    • This will reduce the amount of food that is wasted. Guests can take home a little bit of everything and have lunch or dinner for the next day. If you choose potluck style, then guests can take home their individual leftovers and you aren’t stuck with all of the remaining food.

Skip paper invitations
    • There are lots of great websites where you can create custom invitations for your party and send them via email or text message. These sites allow you track RSVPs, set up potluck instructions, plus loads of other additional features. Punchbowl is one that I like. It’s very user friendly and offers a variety of fun templates for any theme.

Serve seasonal, minimally-packaged bulk food
    • Purchase seasonal local produce and prepare and cut it yourself. This will reduce a lot of plastic waste from pre-packaged fruit and vegetable trays.
    • Purchase deli meat, olives, nuts, and other snacks in bulk. This will not only save you money but will minimize having to toss empty bags and packaging.

Do you have any other ideas for hosting a waste-free party? Comment below with your thoughts and ideas.

Vanessa (Staff)

Wednesday, 11 October 2017

Fused Plastic Bag Tutorial

Despite an unreasonably large stash of reusable fabric shopping bags, I somehow continue to collect plastic disposable bags. We recently blogged about 10 Disposables to Toss From Your Kitchen, so I am taking a renewed look at my waste and making a better effort to reduce my consumption. Meanwhile, I am experimenting with what to do with this collection of plastic bags.

Pinterest is a haven for creative repurposing ideas. Fusing several pieces of plastic together with an iron has been pinned in my account several times over. It was finally time to find out for myself if those crafty pinners are leading me down a path of melted messiness or fashionable eco-consciousness. Therefore, I tried making my own fused plastic bag!

I started by cutting off the seams of several plastic bags and laying each piece flat.
My plastic bags were all different sizes, colours and store brands.
Photo: Ellen Hanna
I opted to hide any logos or writing by keeping the plain side facing out. 
Photo: Ellen Hanna
I matched the various sizes until I had a stack of 8 layers. I placed a towel on the table for protection and a piece of parchment paper on the very top to protect the iron. Then, I pressed firmly until the layers were fused, but not melted away. My iron doesn't have specific temperature settings (or even helpful fabric icons to guide me) but I found the mid-temperature was best. The plastic shrinks considerably, so don't be alarmed!
I needed five pieces to create one bag: two sides, a front, a back and a bottom. 
Photo: Ellen Hanna
I repeated this process several times until I had five pieces of fused plastic sheets. At this point, I decided on measurements for my bag based on the largest size of sheet available.
I decided on the sizing based on measurements after my iron shrunk the fused bags. 
Photo: Ellen Hanna
Using a rotary cutter and a quilting square, I cut the pieces down to their final sizes.

Pieces of the bag, ready to be sewn.
Photo: Ellen Hanna
Then for the fun part! I used a colourful thread to sew the edges together. I don't think this material would lend well to being flipped inside out, so I opted for a visible stitch. I used the widest zig zag stitch, fairly tight. I held the stitch as close to the outer edge as possible.
Visible stitching with red thread. Photo: Ellen Hanna

Next, I pinned two pieces together, right sides facing out and sewed a zig zag stitch straight down. I sewed this on all four edges until the walls of the bag were created. 
The form of the bag beginning to take shape.
Photo: Ellen Hanna
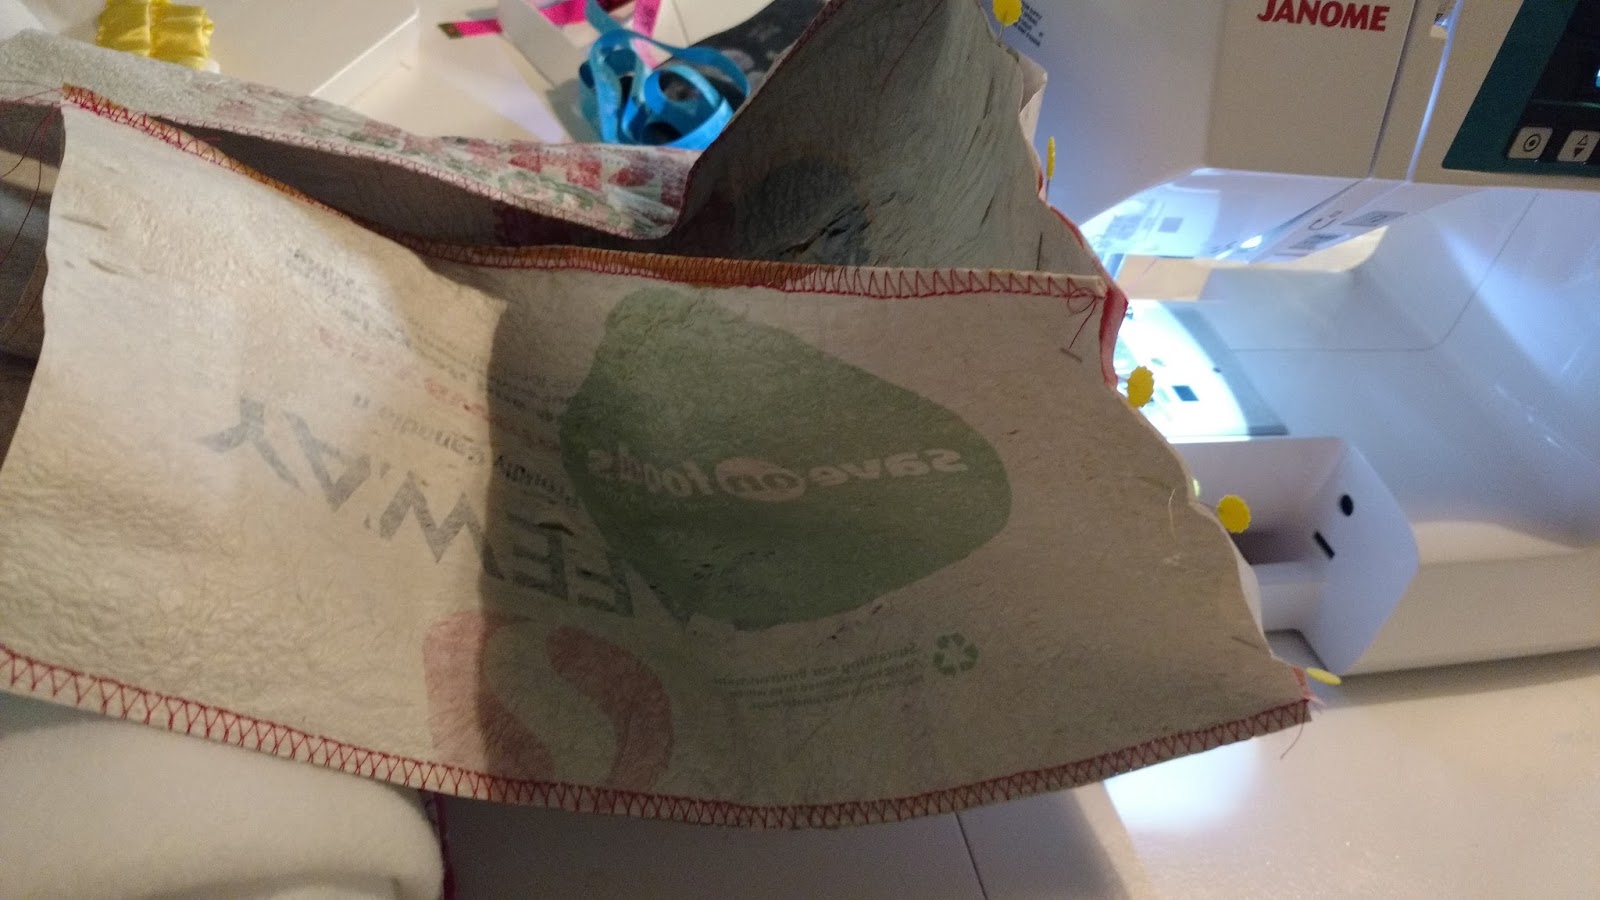
The next step was a bit tricky, so I had to make sure to line things up carefully and use pins! I placed the bottom piece in place, then pinched the edges together in place, while using pins to secure. I picked a spot and started sewing a continuous zig zag stitch around the entire bottom. I was careful to backstitch in the corners to reinforce the bottom of the bag. 
The material is stiff; therefore, lots of pins are needed to keep the bag in place. 
Photo: Ellen Hanna
Stitching around the entire bottom of the bag, backstitching to reinforce in tricky places.
Photo: Ellen Hanna 
The last step was sewing on handles to be able to carry the bag. I decided on using fabric scraps instead of fused plastic for a more comfortable feel. I used a visible stitching for the handle which was similar to the bag. I simply folded a long scrap piece, ironed well and then zig zag stitched down the middle to hold in place. 
Simple fabric handles.
Photo: Ellen Hanna
For a more polished look, another option is to stitch a straight stitch down a folded piece to create a tube, then flip the tube inside out to make a strap without a giant zig zag stitch visible in the middle. However, I worked towards a "shabby chic" look and didn't mind the stitching showing or the rough edges on the inside. 
Fabric handles sewn to the inside of the bag.
Photo: Ellen Hanna
I made this in haste while my brother was visiting with his family. It was meant as a gift and I wanted to give it to them before they flew home. As it turns out, they have been using it as a diaper bag non-stop for the past 4 months. It has been dragged around everywhere, while being emptied and filled endlessly. It is still in great condition; therefore, this bag made with fused plastic bags is a real winner for strength! 
Not too shabby for a first effort!
Photo: Ellen Hanna
Happy crafting!
Update: Here's the bag after a few months of use, still going strong!


Photo: Tom Ewart
Photo: Tom Ewart


Photo: Tom Ewart
Photo: Tom Ewart