Monday, 26 May 2014

May Reuse It Item - Puzzle Pieces


According to Wikipedia, a puzzle is a game or problem which tests the ingenuity of a would-be solver. Reusing a puzzle seems to bring out the ingenuity of the crafter or artist as we see here in May's Reuse-it item post.

Sarah


Source: Instagram

There are tons of craft tutorials out there to use up mismatched puzzle pieces, but in my quest to find something for this month's topic, I wasn't seeing a lot of ideas that keep the puzzle intact, or use the original pictures. This crafter has taken large chunks of a puzzle, shellacked them with some kind of crafting glue, and used them as gift tags. I really liked this approach, and I thought this idea would also work really great as part of a scrapbook or shadowbox collage. This way, even when some pieces of your favourite puzzle go missing, you can still enjoy your favourite parts of the picture.

Lana
A puzzle with all the pieces can be covered and personalised to make a new one - but what of the ones that are missing pieces? Kids' Chaos has designed some really cute greeting card printables that make use of them, offered for free here. All you need to do is print and add puzzle pieces! Using theirs as inspiration, here's one I made for my anniversary.


Nichole

I've realized I personally own about 70 percent of the world's total jewelry, so I spend a lot of my time looking for cool DIY furniture crafts. If you thought I wouldn't find one for puzzle pieces, you'd be completely wrong! UK designer Rupert McKelvie spent hundreds of hours gluing thousands of puzzle pieces from incomplete sets into a side table. Not sure how sturdy it would be for actual use, but failing that what you really have here is art. Check out the website Design Milk for more pictures.

Emma

As a parent jigsaws are a double edged sword; they make a great quiet activity for the kiddos but making sure all of those matching pieces stay together is a job in itself. Knowing that I could make these gorgeous fridge magnets with puzzles missing pieces makes me not want to be quite so worried about keeping them all together.

Michelle

In this blog, there are many ideas on how to turn a name into a fun and personal room design. This one, on the blog, Honey & Fitz, especially caught my eye as it incorporates dozens of puzzle pieces. Using bright colors, this fun craft would stand out in any room!
Hayley

It's wedding season and website, Mrs2B has some great suggestions on how to use puzzle pieces to personalize the big day! My favourite are the simple wedding cake toppers which are unique and easy to create!

Now it's your turn! Share your favourite ways to reuse puzzle pieces in the comments below.

Friday, 16 May 2014

5 Ways to Reuse Your Way Through Spring Cleaning


Who doesn't love spring? I know I do. After the long and cold winter in Edmonton we're all ready to break out the shorts and flip flops when the thermometer barely hits 10 degrees. Then, of course, we all start getting to work on cleaning out the house and yard from a season of hibernation. Spring cleaning usually means de-cluttering. Fortunately, there are several ways that you and I can pass on any unwanted but reusable items in Edmonton, rather than throwing them out.

Here are my top 5 reuse suggestions for your spring cleaning:

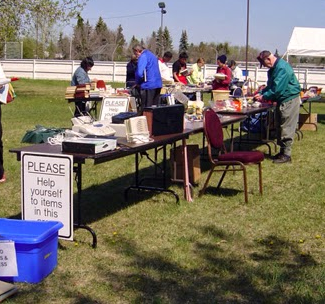
1) Host a garage sale: Why not sell your unwanted items from spring cleaning to people who will enjoy them, and make a little bit of money while you’re at it? Garage sales are also a great way to get out and enjoy the nice weather on the weekend.

2) Donate items to organizations who need them: visit our Reuse Directory here to search for businesses and charities in Edmonton that will accept whatever item you’re trying to rehome.


You can also check your community or those nearby to see if anyone is hosting a Reuse Fair. These amazing events are a one-stop shop for donating items to local daycares, schools and charities.


We also can’t forget about our trusty Reuse Centre! Remember to check out their list of accepted items to see what you can bring to be reused there! Things like your books, board games and craft supplies will find good homes.


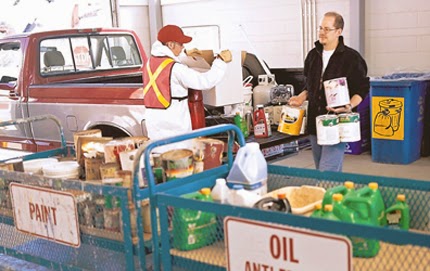
3) Eco stations: Have large items, electronics or household hazardous waste? Bring them to an Eco Station, where many of items, including paint, chemicals and electronics, can be reused or properly recycled. And bonus, most items can be disposed of for free!


4) Big Bin Events: Another option is to drop off your big bulky items is at a Big Bin Event. 12 Big Bin Events, happen in different communities throughout the spring and summer. These events allow residents a chance to drop off large items (like mattresses, couches, chairs, etc.) at no cost! Find the schedule of big bin events here.


5) Grasscycling: Reusing can also be done in ways you would never think possible. There is one way we can reuse all of those wonderful nutrients found in our grass clippings: grasscycling! This fancy word just means taking the bag off of your lawn mower and leaving the clippings on your lawn when you mow. It’s simple to do, it's easier than bagging the grass and it gives some valuable nutrients back to your lawn! For information on how to best grasscycle visit: edmonton.ca/grasscycling


Well, I think we've come up with some great ways to help us reuse this spring! Reusing has a number of benefits including reducing that amount of unwanted but reusable items going to the landfill. So, time for some cleaning. Now that you know where everything can go, it’s time to grab the mops and brooms and get to it! Good luck!

- Leigh-Anna (Guest blogger and staff)

Tuesday, 29 April 2014

April Reuse-It Item: 7 ideas for wooden spools

April's Reuse-it item is spools. Our blogger team has compiled a creative, easy DIY list to make such things as furniture, massage tool or organizers for your crafting items. Share your ideas in the comments section or on our Facebook page!

Lana:
Achy muscles can usually benefit from a massage - and a massager can easily be made from small / medium wooden spools and other materials found at the Reuse Centre.
The Back Massager from Story Soup Kids website needs only 4 spools and twine (length according to own measurements).
I decided I wanted something a bit stronger and structured for hands and feet and started off with spools and coated hangers.


And, made this as a first attempt:


Unfortunately, it's not very pretty, but it is a start. 
During the making, I realised another cool item that could come from the same materials: A bead roller coaster (as inspired by IKEA ):

Hours of fun I'm sure, but first I'll save up some more spools.

Sarah:


This is a really easy craft that you could make a thousand different ways. Write out a message on long slip of paper or fabric, and attach it to an empty, decorated spool to make a unique greeting card! 

.You can use wooden spools or paint plastic ones a bright colour or cover in pretty fabric or paper before attaching your scroll. This is great for any celebration, and makes a cute keepsake ornament for a Christmas tree. 

This would also be a great project for kids to make and play with. Instead of a greeting, draw an adventurer's treasure map or write a secret message inside!

Here's a link to a really basic tutorial.

Hayley:

Using spools as picture holders is a creative way to display those smaller pictures, especially those gems from elementary school that we all have. 

Miniature Rhino has a great tutorial on how to complete them. I also like Belrossa's take on the project. It leaves the thread on, adding a burst of colour to the end result.


Emma:
Empty spools are a great way of organising small pieces of treasured lace, ribbon or trim, just wind it up and pop in a pin. It solves the problem of them getting tangled or mixed up and if you have a lot of little scraps you could even separate by colour and keep them tidy in a Mason jar. Check out Gertie and Mabel for inspiration.

Kelly:

I've always liked the ease and speed of spool knitting. ...but never quite knew what to do with the lengthy cord, which is likely still living in my parents' attic. Pinterest to the rescue! These pieces are great inspiration to whip up a new Knitting Nancy by tapping finishing nails into the top of a large spool. 


- Reuse Centre Blogger team

Friday, 25 April 2014

Reusing in Edmonton: Green Window City Project

The Green Window City Project has brought Edmonton artists and business owners together to #rethinkjunk! How? With creative window installations made from reusable, but unwanted, materials. The event officially launched on April 18th with installations brightening several shop windows in Old Strathcona.

Green Window City Project organizer and Reuse Centre volunteer, Kelly Atkinson, may have "made up" the idea of the Green Window City project after getting involved in the Edmonton art scene and the Reuse Centre, but there was a lot of work involved in getting it off the ground. She had to create a dialogue with several Old Strathcona businesses and local artists to ensure their participation. Kelly also pitched her idea to the Awesome Edmonton Foundation and was awarded a small grant to help support the project.

She invited the Reuse Centre blogger team to participate in this recycled art initiative. We got together on Saturday, April 12 to help build an upcycled window installation to be displayed at Old Strathcona Books. Kelly’s vision for our installation was of large block letters, spelling out "WE ♥ YEG , one letter per window, and every letter covered in a different repurposed material from the Reuse Centre.

Finishing off the cardboard letters

So we cut the letters from cardboard then we all played Goldilocks for a few minutes as we browsed the shelves of the Centre for supplies. These shortbread tins are too big. These trophies are too heavy. These packing peanuts could be cool. But this Physics textbook and that smutty romance novel were just right. Back upstairs with our loot, we made a unanimous decision. The front of the block letters would be different, but the back of every letter would be covered in pages from some of the amusing books we found in the store. There were six letters to be decorated and six volunteers, so everyone chooses one. The "Y" was calling to me.
The G is ready! 
My "Y" ended up covered in bits and pieces from the Physics textbook, a Calculus textbook, a Windows '97 manual, a 2003 astrology guide for Aquarius, a directory of hydraulic motors, and choice sections from Blazing Vixen. Feeling impressed with myself, I started browsing the bounty we had brought upstairs for the perfect thing to decorate my letter.

Michelle working on the heart 
I covered my Y with large, multi-coloured, three-dimensional bows that look surprisingly fabulous glued closely together and covering every inch of cardboard. I had never been so proud of something I'd made by hand, and I don't think I'm the only one. Kelly's enthusiasm is so contagious, and we were all excited to be part of something so cool.

The final result, can you guess what we used to decorate the letters?
The installations officially launched on April 18th in Old Strathcona and will end on Sunday, April 27th. Event details can be found on the Green Window City website.  If the project is well-received, Kelly hopes to see Green Window City extend to other neighbourhoods. So show your support for this innovative recycled art project by stopping by this weekend to check out our installation and the 12 others in Old Strathcona!

- Nichole (Volunteer)

Friday, 28 March 2014

March Reuse-it item: 7 ideas for Fabric

At our last Blogger planning meeting, we decided that each month in 2014 we would to put together a monthly post offering suggestions on how to reuse a particular item on the Reuse Centre's accepted items list. March's item is (raw) fabric and below are a myriad of suggestions on how to reuse fabric cheaply and creatively. Share your own ideas for reusing fabric on our Facebook  page or below in the comments!

Michelle

Here is a simple t shirt head band idea. I have been meaning to try this DIY for months now. Hopefully I will have it done for the summer. Not all store bought headbands fit me that well. Some are too tight. Some just fall off very easily. I think using t shirt or jersey material can eliminate some of the problems I have been having. Check this tutorial out from The Pink Door Mat. Using strips of old fabric you can achieve this headband look. Post pictures on the Reuse Center's Facebook page if you gave this a try! I would love to see them.

Lana

The quickest living / dining room makeover I know: With a large swath of fabric make an instant tablecloth or sofa cover that adds colour and pattern that you can easily change! One day I might actually customize these drapecloths with embroidery or stamps but in the meantime, I'm plenty happy how they can create a big impact and hide clutter instantly.

Emma

You don't always need big plans or complicated designs to make the most of your Reuse Centre fabric finds, small pieces of fabric in the same colour scheme were used to make this dolls quilt for a child. A simple but traditional Dresden quilt design shows off some interesting patterns in similar colours.

Dresden quilt (Source: Flickr: Ruby Murrays Musings)

You may even be lucky and find a half finished gem like this complete quilt block. A completely original find, add some co-ordinating fabric backing, a pillow insert and voila a gorgeous quilted cushion without any quilting know how! I've been lucky enough to find two totally different quilt blocks just ripe for cushion making, these are the holy grail of Reuse Centre finds for me.

Quilt block (Source: Flickr: Ruby Murrays Musings)
Kelly

I previously put some scrap silk to use by making an eye-pillow. It's a 4x10" pouch filled with ½c flax seeds and ½c dried lavender - and mega relaxing. Flax seeds' oil makes for better heat retention, for a thermotherapy bonus from brief microwaving, but rice may be substituted. With different dried herbs, flowers, or teas, even a couple drops of essential oil, the aromatherapy aspect can be tailored as well.

Sarah

This Zip Pouch project requires very little fabric, so it's a great way to use up scraps or small pieces. You could even make one of these with an upholstery fabric sample from the Reuse Centre! It's super simple, and could easily be done by hand if you don't have access to a sewing machine. A little pouch like this is great for organizing change, loyalty cards, or other small things in your purse or backpack.

Nichole

This is the craft I've been looking for! I've been holding onto scraps of fabric for years - too small to do much with, but too big to be trashed. These coasters, made from fabric scraps twined around a length of rope, are such a clever and colourful way to finally make use of this clutter.

Hayley

I love a good keychain and by good, I mean one that lasts longer than six months (I'm a bit hard on them). I found this awesome tutorial on how to may your own key chains from those small bits of fabric that are hard to use. They are durable, stylish and make thoughtful gifts! 


- Reuse Centre Blogger team

Thursday, 20 March 2014

Recycled Doll house Renovation!


This project rocked my world, it was so much fun that for a while I'm ashamed to admit, I teetered on the murky edges of crazy Victorian doll house lady. To date I still have 4 others in varying states of repair awaiting loveliness.

Ok so 5 sounds a bit much? But they kept finding me and they were in need of TLC I just couldn't resist, like this gorgeous 1960's style open sided house. Can you believe this was just $1.50? Craziness!


So here is the starting point, a very blah looking unloved but sturdy wooden doll house, rubber cemented down carpet sample? Check, 80's paint job? Check? Time to get to work.


Top one is the poor unloved shell pre-makeover.


I played around with the design of the rooms and the style, first opting for something bright and modern. Check out the knitted Ottoman and cushion, knitted using toothpicks (yes I am ridiculous but it was fun) and embroidery floss.

In the end I decided on a mix of old and new, some gorgeous vintage fabric and a small remnant of contact paper (all Reuse Centre finds of course) gave me some inspiration for colour schemes. Now to start the demolition!

I ripped out the carpet, the single kitchen tile floor and cut new floors to make it easier to change them away from the doll house itself.

Would you believe that all the flooring was not only FREE but RECYCLED too? Double points!


Bedroom hardwood looking flooring is actually an old bamboo blind.

White flooring is made from popsicle sticks, which took me hours, lesson learnt, bamboo blinds all the way baby! So quick and easy and the indentations from the blind cords made it looks like planks of wood.


Kitchen flooring is real composite tiles sourced from Freecycle, a sample pack of 2x2 tiles cut down, glued then grouted. So pleased with the finished look of this and the fact that it's not only rainbow but real kitchen tiles made me smile.


The curtain rods were small wooden dowels I had in my stash and worked perfectly with cup hooks to keep them in place. It took my little lady at least an hour to pull the rods out but they were popped back in easily, crisis averted.

After searching in vain for some scalloped wooden trim to add to the sides of the under roof area I ended up using some cereal box card and a dollar and tracing my own, a couple of licks of pink paint and we were on to a winner.

The vintage looking roof was created using a dollar store drawer liner, I loved how this turned out, and it smelt like roses the whole time I was papering it. It was pretty lumpy on first application so I sanded it once it had dried and the lumps disappeared and a gorgeous aged, worn in look came about, and all for $3? Score!

Ok ready for the royal tour?


First the living room, wall colour not yet decided so some colourful accessories brightened up the room.


The sofa I made from scratch, stitched from real leather scraps, a block of wood, card and some stuffing, my first try at mini furniture and it's pretty realistic non?

Faux acrylic coffee table is from the base of a Palmolive washing up liquid bottle, patchwork rug is chopped up from small carpet samples. Ottoman is a mini Play-doh tub covered in recycled shoe leather. Table lamp is a dollar store bubble solution bottle, and lamp shade is scrap fabric covered piece of plastic canvas folded and stitched together.


Downstairs bathroom or kitchen as it will be when we add more furniture to the house.


Furniture is by Hape, the blue back splash is a scrap of contact paper stuck to a piece of cereal box and the bin is a $1 toy found around the house.


I added a menu board for when the kitchen furniture is in place, just some corrugated card covered with painted popsicle sticks and sanded for a rustic look, and the best bit? It is actually a chalk board painted with chalkboard paint, all I need now is some teeny tiny chalk!
Moving up the imaginary staircase to the bedrooms, here we arrive in the master bedroom.


Bamboo blind flooring, vintage fabric glued to the walls and a faux chair rail and baseboards/skirting boards were bamboo blind pieces again, such a great source of wood that didn't need staining.

A vintage eyelet doily for a rug, two hexagonal brass drawer knobs as bedside tables and some more miniature sewing.


I hated the way that bedding never sat flat when I was little, so I just sewed a tiny pin-tuck down each side of the bedspread (formerly a place mat), it did the trick and looks a bit more realistic. The pink cushion is knitted again with embroidery floss and toothpicks.


The dresser was given to me and the 'fabric' inside is bias tape or lace seam binding glued and folded around a small piece of cardboard.

Saving the best to last, here is the children's room. The furniture again is Hape, so cute and fun, every detail is thought of.


The rug is some bakers twine looking cotton yarn I had, I just twisted it around a piece of cereal box card and glued as I went, love the rag rug look it has.


Faux cow hide rug is some minky fabric scrap simply cut in a erm, dead cow shape. Check out the amazing vintage contact paper, another amazing Reuse Centre find. I love this design and the fact it has England, Canada, France, Germany and Greece on it and the illustrations are so cute.


The flooring is popsicle sticks sanded cut and painted once stuck down, long time in the making but I do love how it turned out.


The curtains I made and added ribbon tie backs then draped a small piece of pompom trim found at the Reuse Centre over the top.


The whole she-bang.

Soooo still with me? Still awake? Understand why this project was a year in the making?... and just remember I have FOUR more of the suckers to finish lol.

- Emma (Volunteer)

Friday, 14 March 2014

Erin Go Bragh - Celebrate St. Patty's day the Reuse way!

I've personally never been one to get festive over St. Patrick's Day; my motivation for dressing in green has always been more about not getting pinched. What that means is that I've been missing out on some great crafting ideas to celebrate the occasion! Here's a round-up of a few quick and easy crafts to help get your green on for March 17th:


1. St. Patrick's Day cards

Some people feel like every occasion needs a card, and that's okay! Here's an idea on how to make a four-leaf clover stamp out of toilet paper tubes for your card-stamping pleasure.


2. Shamrock hair accessories

I really kind of love the concept of festive hair accessories because it's not like an elaborate costume you have to keep adjusting. These items can be worn from morning to night, and should last through all the pints of green beer.

Nothing says "Ireland Forever" like shiny green sequins. This craft requires a few of these as well as piece of green felt, some glue and a hair tie.

Not a fan of sequins? Or maybe you don't have enough hair to tie? Here's another great idea for a festive shamrock from felt, glued to a bobby pin for more versatility.

3. Home décor

Don't be shy. Bring the luck of the Irish home with some of these festive crafts.

A wreath form, some burlap, green fabric flowers and colourful ribbon. That's pretty much all you need to create this "lucky" wreath! This crafter attached everything to the burlap with Velcro so that the pieces can be switched out later in the year for other occasions. What a versatile way to decorate your home!

Some of the items for this next craft you can likely find at the Reuse Centre, but it might require a trip to a craft supply store. In any case, if you can get your hands on some burlap and some green streamers, you can make your own monogram letters for this "Lucky" banner.


"May your pockets be heavy and your heart be light,
May good luck pursue you each morning and night"

- Nichole (Volunteer)