Showing posts with label Reusing. Show all posts

Wednesday, 21 October 2015

Magazine Strip Silhouette Art

This summer felt like it stampeded by, so it was particularly nice to have a free Saturday morning! I ended up blocking it off for a fun project with friends which included coffee, craft therapy, and grownup talk.  The project at hand was to make magazine strip silhouettes, and my goal was to make it simple, modern, and a fun distraction from our routine troubles.

Step One: Print Stencil/Silhouette
In preparation for this project, you'll need to choose your images. We found stencils and silhouettes online, then resized them to print onto a full letter sized page.  Images with more surface areas are ideal. For more intricate images, like the zebra, fish or raccoon-Mario, an alternative is to use the magazine strips for the background, rather than for the silhouette itself. (You'll see what I mean later!)

We had a wide variety of images to work with!

Our magazine stash.

Step Two: Choose Colourful Magazine Pages
Pull out pages with a lot of colour or intricate patterns, which will make the silhouette look fuller.  Try to choose pages with colours that will contrast with the background paper you intend to use.

It's okay to have some pages with words or body parts, since these won't be very noticeable in the cut strips. 


Step Three: Cut Strips from Magazine Pages
Fold the magazine pages accordion-style to create nice, straight cutting lines that are the same distance apart. Alternately, you can use a ruler and draw cutting lines. Note that the thinner the strips, the more gluing you will have to do.

Cutting the strips takes patience, but it's worth it!
Be very careful to cut as straight as you can, because it will help when pasting the strips side-by-side. While cutting, my friend came up with an ingenious plan to use a shredder.  Try it out and let me know!


Paste strips on the back
of a printed page.
Step Four: Glue Magazine Strips to the Back
The fun part! Paste the strips as you please on the backside of the stencil pages. The pattern is up to you. We alternated a variety of strips of different colours to make a rainbow effect.  I have seen some projects done with gradients of the same colour, which has a desirable look as well.

Keep in mind that the strips only need to cover the image, so you don't necessarily have to cover the entire page.  Rotate and place magazine strips strategically, depending on where the image cutout will be.  Some of the strips won't be cut perfectly straight, so just overlay them to ensure no blank spaces are showing.

Step Five: Cut out Silhouette and Paste Striped Silhouette onto Paper
Depending on the silhouette, you can also turn the original cut sheet into a second art piece, as with the deer silhouette shown below. As I mentioned earlier, this would work really well for more intricate images like the zebra.

The negative space inside the remaining magazine strips still looks neat! 
Cut-out striped silhouette.
Left, we have the striped silhouette on coloured paper, and on the
right, the leftover striped background over coloured paper.
Step Six: Enjoy Finished Art Piece! Frame and Gift at Your Leisure.
I'm really glad that this turned out so well!  We were really worried that this would turn out to be a pinterest fail moment.  I still have tons of magazines left over, so I will have to come up with another craft therapy session soon!
Our finished silhouettes, ready for display.

- Siao (Volunteer)

All photos provided by Siao.

Tuesday, 16 June 2015

New Idea Cards Inspire Reuse Centre Customers

CD/DVD Picture Frame
You may often find yourself wondering exactly how some of the items at the Reuse Centre can be reused or repurposed. Luckily for our customers, the staff have come up with the solution of putting up idea cards throughout the store!
Customer curiosity was what motivated the Reuse Centre Coordinator, Kristin, to create idea cards and place them around the store.  People shopping or donating would often exclaim that they would have no idea what to do with things like bread bag tags or empty CD and DVD cases. Therefore, the idea cards seemed like an excellent way to reach out to the public and fulfill the Centre’s goal to educate people about a variety of creative and very useful ways to reuse different items.

Stamps Photo Frame
Idea cards are placed throughout the aisles and offer suggestions on a wide variety of crafts and DIY projects on how to reuse the items we sell. Each colorful card shows a picture example of the craft or project, with a list of materials and a link to a website with instructions or a tutorial.
So far, the staff have received positive feedback about the Idea Cards, and we have also noticed customers browsing through them while they shop. Even our younger customers love to take a look at fun crafts they can create with the items.


Paper Plate Dream Catcher
Given the positive responses from customers, staff are looking at using different methods to promote reuse of our items around the store. One idea we would like to try is a more prominent display of ideas on the wall for more people to see. Another exciting possibility is to compile and display a collection of submissions from the public on the projects they have completed with items from the Reuse Centre. 

Next time you visit, keep an eye out for the Idea Cards and be inspired to create something new with your next purchase of reuse items! Share the way you reuse our items below!

- Lynnette (Staff)

Friday, 22 May 2015

Homegrown Reuser: Kersti

This is the third installment of our Homegrown Reuser series. Let me introduce you to Kersti from Bramble Handmade; she love to recycle, repurpose, and redesign! It's her motto!

Who are you? 

Hi, my name is Kersti, from Bramble Handmade. I am a local artist from Calgary who recycles, repurposes, recreates and redeems old items into happy, new loves. I strive to give old and unappreciated pieces new life through changing their looks and updating their uses.
I love to take old (usually ugly!) picture frames, and recreating them into lovely practical earring display frames, chalk boards, or white boards.

Where do you get them?
I get all my various frames, furniture, tins, buttons everywhere, literally, from back alleys. To the dump!

What is your favorite piece of work you have done and why?
I don't know if I have a favorite piece to be honest. I really love that every piece I make is different and I try to pull the unique features out of each piece, because we are all different. Similar, yet different. 
Vintage Button Bobby Pins

What inspired you to do this?
I have always been able to create and use recycled products, so it just made sense! There is so much in the world that we think is useless,but it isn't. It just needs to be recycled, redesigned, repurposed, and finally redeemed!

Do you have any tips/ inspiring words to share with newbie reusers?
Just have fun, get dirty, and challenge yourself! 

What are your goals for the future, both with work and life?
My greatest goal for my life is to love Jesus, live with passion and love others fiercely. How that works itself out I am very excited to see! With Bramble Handmade, I am just trying to learn as much as I can, help make beautiful useful art for our homes, and completely unique jewelry. I also want to teach others how to look past what is in front of us, and see the beautiful potential in old, used or broken pieces. 

Where can we find you?
I am on Facebook, Instagram, and Pinterest under Bramble Handmade. I also have a website which is under construction. So very soon you'll be able to see what I do, know where I am going and where to buy my pieces. at www.bramblehandmade.ca. 
Facebook: Bramble Handmade
Instagram: Bramble Handmade
Pinterest: Bramble Handmade


- Michelle (Volunteer)

Saturday, 4 April 2015

Homegrown Reuser: Jan Przysiezniak

There are a LOT of creative reusers in the Edmonton community and in Alberta! So I decided to profile a few of them for the Reuse-it Edmonton blog to learn their tips and tricks for reusing. First up is Jan Przysiezniak, who runs JellyParrot Trashcrafts. You might recognize him from his booth at the Old Strathcona Farmer's Market.

Who are you?
I'm Jan Przysiezniak. I run JellyParrot Trashcrafts. I make useful things (notebooks, belts, etc.) out of repurposed things (used paper, bicycle tires, etc.). I studied to be a scientist (neurobiology) but didn't want to write for a living. I've always had an interest in do-it-yourself recycling. Now it's how I make my living. My schooling and obsessive nature help with understanding of and working on details to make a sellable product. I sell my work at the Old Strathcona Farmers' Market. I do some yard work in the summer, for extra cash and to get outside.

I also make things like pedal-powered devices, lamps from found objects and bicycle parts, person-sized sculptures from bike parts, bags from truck tie-down straps, shower curtain rings from bicycle spokes, stringed instruments from found lumber, flutes from found electrical conduit, furniture and yard equipment from found lumber, etc.


I live in Edmonton, in the Bonnie Doon neighbourhood, in a shared rental townhouse. I don't own or drive a car. I cycle, walk, bus. I help people fix their bicycles at Edmonton Bicycle Commuters, on Monday nights. I'm vegetarian. I play recorder. I refuse to be part of the rat race. I like my frugal living.

What materials do you use and where do you get them?
I make journals from this:
- One-side-good paper, donated, or scavenged from recycling dumpsters.
- Vinyl records and their cardboard sleeves, donated.
- Miscellaneous boxboard and flat things for making journal covers, scavenged from my home recycling box or elsewhere.
- Clothes hangers, donated by my neighbourhood dry-cleaner (TODD cleaners).
- White glue, bought.

The belts contain this:
- Scrapped bicycle tires from Edmonton Bicycle Commuters (EBC) community bike shops, United Cycle, Velocity Cycle.
- Scrapped bicycle frame tubing, bottom-bracket lock rings, headset spacers, fender struts from EBC.
- Stainless steel nuts and bolts bought from Edmonton Nut & Bolt.
- Tremclad clear lacquer bought from Home Depot.
- Time on the bench grinder at EBC, in exchange for some volunteer work and the occasional new grindstone.

For other projects, I use the few scraps I've accumulated at home, or go looking for materials when I have a specific project in mind. Sometimes I find that it takes less time to make a part than to go out to buy it.

What is your favourite piece of work you have done and why?
My favourite piece was the most functional:
In 2012 I helped Operation Fruit Rescue Edmonton (OFRE) upgrage their hand-cranked apple crusher so it could be pedal-driven. Now it just races through bags and bags of apples. Ninety percent of the materials for the upgrade were reused/repurposed.


What inspired you to do this?
My inspiration was the need for OFRE to speed up their fruit processing.

Do you have any tips/ inspiring words to share to newbie reusers?
Reusers are already inspired.

What are your goals for the future, both work wise and life?
Keep doing what I'm doing, but more, and less boring.
Play more music.
Cycle out of town more often.
Keep living slow and never get sucked into the rat race.
Never retire.
Help save the world from humans, for future humans.

Where can we find you?
I sell my work at the Old Strathcona Farmers' Market, every Saturday, 8am-3pm.
I have no web site, but I can be reached at jellyparrot@hotmail.com

- Michelle (volunteer)

Friday, 27 February 2015

February - Reuse-it item: Milk Bottle Caps

There are a variety of fun, creative ways to reuse milk bottle caps. Here are some ideas that our bloggers have come up with. Add your own ideas in our comment section below!

Sarah
This DIY checker set uses lids all of the same colour and puts stickers on them to make two teams, but milk jug lids come in so many fun colours that no decoration is needed. This got me thinking that you could also use milk jug lids as replacement tokens in all kinds of games. Lost a checker piece from an otherwise full set? Substitute a milk jug lid. Not enough poker chips? Milk jug lid. Tiny top hat from your Monopoly game went missing? You guessed it: milk jug lid!

Mallory
As someone with an abundance of lamps without lampshades, finding this little project was almost an act of divine intervention! All you need is milk bottle lids, a needle with some string, and something circular (maybe an old coat hanger bent into a circle?). You can get as creative as you like with different colours hung in patterns or some spray paint for a nice uniform look for a truly personalized work of art and household practicality!

Tamara
Do you like putting up lots of photos, postcards, coupons, etc. on your fridge? A fun way to brighten up the outside of your fridge is to make magnets with plastic milk bottle lids! Just save those lids, wash 'em, buy some magnets and use a glue gun to stick them on!

Another cute idea? Write notes on the lids and pop them in your children's lunch boxes so they'll receive a cheerful message when they eat their lunch at school :)


Lana
This watering can made from a pierced milk jug lid and milk jug is ridiculously simple and also brilliant.  No more uncontrolled glugs from the water bottle for my plants!  Soon they will be showered with gentle droplets. 

Tutorial at A Journey To A Dream 

- Reuse Centre Volunteers

Friday, 16 May 2014

5 Ways to Reuse Your Way Through Spring Cleaning


Who doesn't love spring? I know I do. After the long and cold winter in Edmonton we're all ready to break out the shorts and flip flops when the thermometer barely hits 10 degrees. Then, of course, we all start getting to work on cleaning out the house and yard from a season of hibernation. Spring cleaning usually means de-cluttering. Fortunately, there are several ways that you and I can pass on any unwanted but reusable items in Edmonton, rather than throwing them out.

Here are my top 5 reuse suggestions for your spring cleaning:

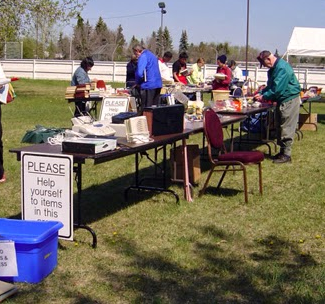
1) Host a garage sale: Why not sell your unwanted items from spring cleaning to people who will enjoy them, and make a little bit of money while you’re at it? Garage sales are also a great way to get out and enjoy the nice weather on the weekend.

2) Donate items to organizations who need them: visit our Reuse Directory here to search for businesses and charities in Edmonton that will accept whatever item you’re trying to rehome.


You can also check your community or those nearby to see if anyone is hosting a Reuse Fair. These amazing events are a one-stop shop for donating items to local daycares, schools and charities.


We also can’t forget about our trusty Reuse Centre! Remember to check out their list of accepted items to see what you can bring to be reused there! Things like your books, board games and craft supplies will find good homes.


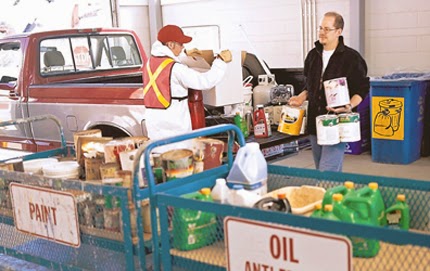
3) Eco stations: Have large items, electronics or household hazardous waste? Bring them to an Eco Station, where many of items, including paint, chemicals and electronics, can be reused or properly recycled. And bonus, most items can be disposed of for free!


4) Big Bin Events: Another option is to drop off your big bulky items is at a Big Bin Event. 12 Big Bin Events, happen in different communities throughout the spring and summer. These events allow residents a chance to drop off large items (like mattresses, couches, chairs, etc.) at no cost! Find the schedule of big bin events here.


5) Grasscycling: Reusing can also be done in ways you would never think possible. There is one way we can reuse all of those wonderful nutrients found in our grass clippings: grasscycling! This fancy word just means taking the bag off of your lawn mower and leaving the clippings on your lawn when you mow. It’s simple to do, it's easier than bagging the grass and it gives some valuable nutrients back to your lawn! For information on how to best grasscycle visit: edmonton.ca/grasscycling


Well, I think we've come up with some great ways to help us reuse this spring! Reusing has a number of benefits including reducing that amount of unwanted but reusable items going to the landfill. So, time for some cleaning. Now that you know where everything can go, it’s time to grab the mops and brooms and get to it! Good luck!

- Leigh-Anna (Guest blogger and staff)

Tuesday, 3 September 2013

Reflections on my summer at the Reuse Centre

This summer I was given the opportunity to become a part of the City of Edmonton’s Waste Management family. My role would be carried out at the Reuse Centre as a summer student, assisting with the daily operations of the Centre. I would be getting a behind the scenes look at the inner workings of one of Edmonton’s most effective waste management initiatives.

Patrick sorting through donations

As my time at the Reuse Centre went on, I started to realize how my studies at the Kings University College as a environmental studies student and the operations of the Reuse Centre coincided. At school I had learned about the effects of human activity on the environment and our creation of a society that chooses to be wasteful in nature. Consequently this has led to adverse effects on the environment such as resource depletion, environmental degradation and pollution to name a few. At the Reuse Centre I have been able to see the operations of a service that tackles these socially created environmental issues. The concept of reuse has become very important in changing people’s perception of what is reuseable. I have seen how people are willing to rethink how they conceive what can be done with their unused items. This summer I have realized that Edmonton is full of thoughtful people who take their time to come by the Reuse Centre to drop off items that are in good condition. Items they feel someone else would like to use, when the easier option would be to throw it away.

This interesting book that was donated, a bit dated but still reusable
It is this concept of reusing that allows for the success of the Centre, as well as its promotion of
creativity. After all the idea is to change people’s perception of what is reuseable, by demonstrating to them that with creativity most items can be given a renewed purpose. Whether it’s getting creative with a broken lamp shade or using keys to make a wind chime. Really the possibilities are endless. If anything my experiences at the Reuse centre this summer has demonstrated to me that it’s not merely about encouraging people to reuse. It goes beyond that. It is also about spreading a message of rethinking about what we once considered useless.

- Patrick (Summer Student)

Tuesday, 30 July 2013

How do YOU make it REUSABLE contest!

We often wonder what our customers do/make with items they buy in our store. We have a lot of creative, imaginative customers and frankly, we're curious!

So we decided to put together a contest to showcase our customers' reuse creativity! We are asking you to submit your favourite way to Reuse items on the Reuse Centre accepted items list.  We want to see all the wacky, creative, fun, useful or innovative ways you use the items on our list. All entries will be posted on our Facebook page and the winner will get profiled on our Reuse-it Edmonton blog.

Here is how to enter: Submit photos and a short blurb (up to 200 words) of how you have reused the items found on the Reuse Centre accepted items list to hayley.orton@edmonton.ca before the deadline of Friday, August 16th. Please include your name, email address and phone number in your submission (your last name, email address, phone number will not be published).

All entries will judged by our panel of Reuse experts on the entry’s creativity, innovation and reusability. The panel will decide on a winner who will be notified by email or by phone. 

Prize: Our winner will get profiled on our Reuse-it Edmonton Blog and also be awarded a Reuse Centre gift basket (to be picked up at the Centre). The profile about the winner and his/her winning entry will be posted on our blog on Monday, August 26th.

Rules: ALL entries must contain original images taken by the submitter. All photos submitted will be posted on our Facebook account during the contest. All entries must contain items from the Reuse Centre accepted items list. This competition is open to only those living in Edmonton Capital Region. 

If you want a good starting point, scroll down for some inspiration we’ve put together!


Good Luck and Happy Reusing!


Christmas decorations made from frozen juice can lids


Using baskets, coffee cans and shoe boxes for storage
Using various items including magazines, carpet and buttons to make pieces of art
(inspired by the visual artist Lee Gainer)


Little owls made from paper towel rolls, 
monster bookmarks, popsicle stick airplanes 
and fish made from CD's
- Reuse-it Edmonton Blogger team

Friday, 1 March 2013

7 Ways to Reuse Magazines

If you've been to the Reuse Centre, you know we have a huge collection of National Geographic magazines, so we decided to brainstorm and research interesting ways to reuse them. If you don't have any old magazines sitting around your home, stop by and grab some from us to get started on these great reuse projects!

1. Reuse Decor - The beautiful and inspiring pictures found in National Geographic magazines can become treasured pieces of art in your home. Find an old frame (we have some of those too!), cut out a favourite picture and place it in the frame. It's as easy as that!

2. Magazine Coasters - Want to show off your DIY skills next time you have company over? Make these cool magazine coasters and put them out at your next party.


3. Gift Wrap - Have you found the perfect gift for someone special but can't quite decide how to wrap it? Come to the Reuse Centre and we will help you find a National Geographic magazine from the month and year you are looking for. Whether you're celebrating a birthday, anniversary, or other occasion, a National Geographic from the special date will make great gift wrap... and you can include the rest of the magazine in the gift for the recipient to flip through. If you're feeling extra adventurous, you can make your own bow too!


4. Magazine Bowls - Jewellery, accessories, and home decor made from old magazines have become quite popular recently. Instead of buying one of these bowls from a store, save your money (and some trees!) and make your own.


5. History Lesson - Old National Geographic magazines can make great resources for teachers. The magazine was first published in 1888 and has been providing readers with a wealth of information since then. One of the oldest issues we found at the Reuse Centre recently was from June of 1957. Bringing a magazine like this into a classroom could be invaluable for teaching students about the history of our world, how it has changed, and how it has stayed the same ()
 
6. Magazine Magnets - This project will require you to purchase a couple extra supplies, but could result in a cute and thoughtful homemade gift... or you could just keep them all for yourself! Grab your crafting supplies and some interesting pictures from an old magazine and have fun making your own unique magnets!


7. Travel Inspirations - Who would have guessed that the very same National Geographic issue mentioned above from June, 1957 would have a 21-page story (complete with several full-page pictures) about the beautiful Maldives islands. A dream destination for many even today, the author of this article talks about how long he has waited to visit this paradise. The amazing pictures and incredible stories about destinations around the world could inspire you to take your next vacation now!


- Marissa (Volunteer)