Friday, 24 May 2013

Goodwill Industries names the Reuse Centre Community Supporter of the Year!

On Wednesday, May 9, the Reuse Centre was named Community Support of the Year award by Goodwill Industries of Alberta!! We felt very honoured by such recognition!

Our relationship with Goodwill Industries began in September 2011 when the Reuse Centre began recruiting community groups to volunteer as Sorters in our facility.
Goodwill Industries of Alberta’s Power of Work program was the first group to sign up. The program supports people living with disabilities in locating volunteer opportunities in their communities. It was the perfect match – the Reuse Centre provided the Goodwill volunteers the opportunity to learn sorting, group and organizational skills and we got a group of cheerful, enthusiastic and dedicated volunteers. The partnership quickly grew from the volunteers coming in once a week to four times a week. Doug and Charlotte are part of the Goodwill group of volunteers. They are truly a joy to be around with their big smiles and positive attitudes. They have become an integral part of our store. In 2012, Doug and Charlotte and the rest of the Goodwill group contributed over 1600 volunteer hours at the Reuse Centre!

Charlotte and Doug
Shortly after Goodwill volunteers began volunteering at the Centre we furthered our partnership with Goodwill. Goodwill and Reuse Centre exchange goal specific items in an effort to ensure the cycle of reuse continues and this system helps us reduce the amount of waste going to landfill.

Goodwill Industries has been very generous to us at the Reuse Centre. In 2012, Goodwill presented us with the 2012 Volunteer Organization Recognition Award. The award recognizes organizations that provide outstanding support for persons in the community with barriers to employment by providing volunteer work opportunities. And then this year, we were nominated and won the Community Partner of the Year Award given to organizations that help Goodwill reach its goals.

Reuse Centre Staff Karen, Hayley and Sarah shortly after accepting our award!

We felt very honoured to work with Goodwill to reach our goals and humbled to be the recipient of these awards from such a great organization. We look forward to a long and fruitful partnership with Goodwill.

Tuesday, 7 May 2013

Tutorial Framed Button Monogram


Mother's Day is fast approaching and it's an occasion for which, I'm sorry to say, I've always had a little trouble in coming up with a good gift.  The day calls for something small, and understated which is a difficult concept for me.  Fortunately, my addiction to Pinterest provided me with a few great (and easy!) ideas for something nice for my mom.  She's been doing some redecorating lately, and trying to find some new and interesting things for the walls, which is why I finally settled on making her a framed Button Monogram.


For this craft, you will need:
A picture frame
Something onto which to mount the buttons: some wallpaper/a square of fabric
A lot of buttons
Glue (hot, crazy, craft) OR Needle and thread
A pencil

My mom has pretty classy taste, and she's really into black and white graphics.  I decided to design her monogram with black/dark buttons on a white background, then mount it in a black frame.  I found a nice, unused 8" x 10" shadow box lying around the house, but you can also find the perfect frame at the Reuse Centre!  

I removed the insert with the cheesy photo from the frame and used it as a template to cut out the anaglypta wallpaper I found to use.  I like the textured quality of the anaglypta, but an interesting piece of fabric would be equally lovely.

I didn't want to waste buttons or wreck the monogram by free-styling their placement, so I first laid out a few loose buttons in an "S" shape to help choose the right sizes and colours.  You could also trace the letter you want with a pencil, but the pattern on the anaglypta made this a bit difficult.  This way, you can make any necessary changes before you make anything permanent with glue.  (In this case, I switched out the big buttons for smaller ones and used some coloured ones instead of all black.)


If you're using fabric, you'll probably want to secure the buttons with needle and thread.  After attaching the first layer of buttons, you can plump up the monogram by filling in any empty spaces with more buttons.  Allow the monogram plenty of time to dry, then just pop it in the frame!  I finished it off with some pearly pins in the corners for some added interest.  


This was unbelievably easy (and needless to say, economical) to assemble, and now my mom will have something new for her walls.

Happy Mother's Day!

-Nichole (Volunteer)

Tuesday, 30 April 2013

Tutorial DIY Paperclip Earrings


With Spring finally sticking around, it seemed like a good time this week to start my spring cleaning.  My first order of business was to address my colossally huge collection of jewellery and, after weeding out the broken earrings and pendants, I ended up with a pretty nice collection of beads and earring hooks that I could repurpose.  After doing a quick search on the web for ideas, and consulting a couple of crafty friends, I came up with a supremely easy plan for my repurposed jewellery items: paperclip earrings.


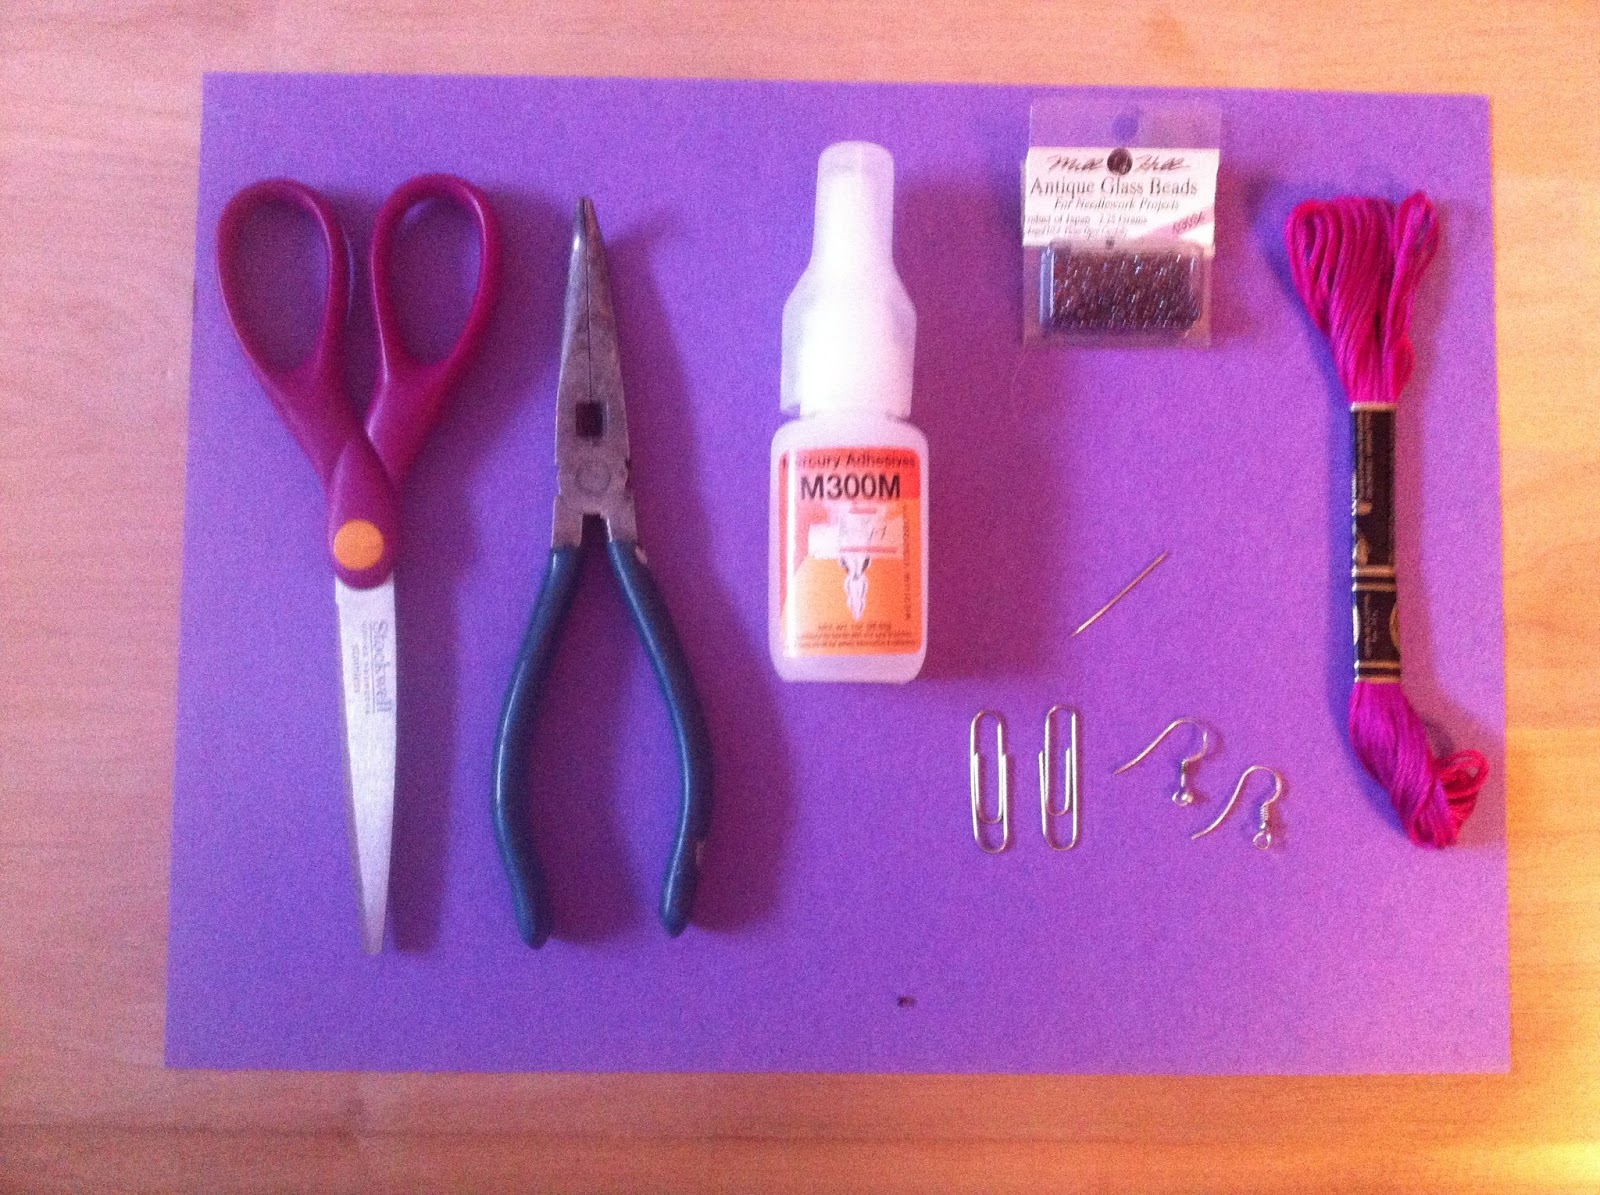
For this craft, you will need

Two earring hooks,
Two paperclips of the same size that you don't mind deforming,
Cotton or wool thread (and lots of it),
Reliable glue suitable for crafting,
Needle-nosed pliers (for the hooks), and
Scissors.
Optional: Colourful beads, and possibly a sewing needle.


This craft is very easy, and limited only by the colour of thread you may have at hand.  Fortunately, my mother used to cross-stitch when I was little, so I didn't have to go far for a huge selection of thread.  What I love about these earrings is that you can switch up the colour whenever you want, to match whatever you need.  Even better, they are really unique!  Here are the steps:

First, you need to straighten the edges of your paperclips to make a triangle.  It's best to have the overlapping edges overlap on top of each other instead of putting them side to side, as this will create a weird bump that will be noticeable from face-on.

Once the clips are shaped, you need to start attaching your thread to the wire.  What seemed to work for me was dabbing a bit of the glue to the clip, then pressing the thread to the glue to secure it.  And even then, I made a knot with the thread on top of the glue to make it extra, extra secure.  

(I should note here that the beads I wanted to use are the tiny little glass beads, so I split one strand of cross-stitch thread in half to be small enough to go through.  After securing one end to the clip, I pulled the loose end through a sewing needle for later on.)
Now that the thread is attached to the wire, you can start wrapping the thread around the paperclip.  I'll be honest, this takes FOREVER because you want to make sure you wrap it tight enough that the clip is well covered and won't show through. 

Keep wrapping until you've gone all the way around and you're back at the spot that you knotted and glued.  And then wrap over that!
Now, there are a couple of ways that I've seen these earrings done.  I'm personally a fan of the "dream-catcher" style.  To do this, you pretty much just run the thread across the paperclip frame in a haphazard manner, creating a spiderweb-like effect.  You can leave these webby threads bare, or you can dress them up with some beads (as I have done here).
  
The other way I've seen these earrings done, is to wrap the thread across the whole frame until it is partially or completely covered, as you can see from these lovely specimens by a friend.  (I think she also used wool thread for these.)

Now that you've threaded and decorated your earrings to your taste, you need to secure the other end of the thread.  Since the wire is covered, you'll need to either glue the end of the thread to a spot that won't be noticed too well, or make some kind of knot (which is easy if you have a sewing needle at hand).
Finally, you need to attach your earring hooks to whichever spot you've decided is the top of your earrings, and use your needle-nosed pliers to make sure they're secure. And you're done! 
-Nichole (Volunteer)

Friday, 5 April 2013

Redecorating the Reuse Way

Spring is here and you know what that means; a new season of fashion is upon us! New colours, new styles, and a brand new "it" item for everything from clothes to shoes, bags, and yes, even home decor.

Luckily redecorating doesn't have to break the bank. The style and feel of a room or space can change in an instant just by altering a few key details, and that doesn't necessarily mean purchasing brand new items! With some supplies and a few simple tweaks, it is easy to transform and reinvent your space, time and time again.

Just to get you started, here are a few of our favourite ideas for creative redecorating.

-Want to add a pop of colour or texture to an otherwise neutral space? Or maybe you've got an old-fashioned lamp that you just know could be a great piece if only it wasn't so outdated. Why not try re-covering your lampshades with fabric? Adding trim to the edges of a plain lampshade is an even easier alternative, if you're a fan of more subtle details. Here's a great tutorial if you aren't quite sure where to begin. This blogger takes a plain white shade and transforms it with a simple, printed cotton.

-This is an oldie but a goodie and one that a lot of people don't think of, but if you're rocking a hand me down couch of dubious style, why not try a slipcover to hide that floral velvet or pilling fabric? If your furniture is hard to fit, buy a length of upholstery fabric; with some clever draping and a few tucks, you've got a brand new look!

-Adding throw pillows are a classy (and comfortable!) way to change the look of a room. When yours become outdated, simply re-cover them! Sewing a pillow cover is a quick and easy project, even for beginners, and can be done by hand if you don't own a sewing machine! And here's an even simpler, no-sew tutorial.

Here's an insider tip from one of our customers that makes this project even easier: upholstery fabric samples make great pillow coverings! They are pre-cut and made of durable fabric that will stand up to a lot of abuse. Using a different, but coordinating, fabric for each side of the pillow gives you even more day-to-day decor options.

-Paint or stain your wooden furniture to make it modern! Or change the hardware on a beloved piece to update it. This is a great tip because hardware changes are completely reversible and there is little risk of damaging the furniture itself.

-Personalize just about anything with homemade tile mosaics! Here at the Reuse Centre we're always getting samples of different kinds of tile in various colours, patterns, and textures that are just perfect for small to medium projects. The Joy of Shards is an amazing resource for mosaic making, complete with ideas and tutorials.
 Tile mosaics aren't just for tables or flat surfaces either. Try covering plant pots, jewelry boxes, picture frames, or even make a large piece of art for the wall!

-Move those knick-knacks! This is the cheapest, easiest trick of all, but if you're anything like me, you get stuck in the habit of "where things go." Maybe that lamp would look better in the bedroom, and perhaps that vase complements your bathroom better than it does the kitchen. Pretend you're moving in all over again, and mix things up!

These are just a few of many ideas for incorporating reuse into your redecorating. What are some of your favourites? Please share in the comments section!


-Sarah (Volunteer)

Wednesday, 27 March 2013

Tutorial Easter Bunny Egg Cosies


Rummaging through the fabric bins for some Easter inspiration I came upon some small remnants of psychedelic fabric I can only imagine hailed from the 70''s.  Floral? Check. Random colours? Check. They caught my eye and needed showcasing, but how?

Sometimes all it takes is a small piece of a bold fabric to make the project pop, this is that project.

What you'll need:

Small piece of mid weight fabric, denim or cord are perfect. The fabric will need to stand up on its own when sewn together so nothing light or drapey.
Scraps of a bold patterned fabric
Scissors
Sewing machine

Optional: bias tape maker, pre-made bias tape


Using the shapes in the photo cut out two arc shapes, this will be the main piece and should be no bigger than the palm of your hand. 

Cut two ear pieces, round off the ends of two rectangles, repeat with patterned fabric.

Lastly cut out one circle 2 inches across.


Right sides together sew your patterned and main fabric ear shapes together reinforcing stitches at start and finish of each piece.


Flip right sides out, at the open edge fold the sides of the ears in, pinch and sew across to make a rolled ear shape. Repeat for the other ear.


With the raw edges of the ears lined up to the top edge of the main arc shape piece, stitch both ears down ensuring they are evenly spaced across the top edge and leaving a gap in the middle.

Layer the other main arc shape on top of the piece you have sewn the ears to and stitch three quarters of the way round, starting at the bottom edge and finishing halfway down the opposite side.

Add bias tape (or double fold) the raw bottom edge. I made a faux bias tape by using a 1 1/2 inch strip of the patterned fabric on the straight grain, double folded it then stitched it down, opening up the bunny to make the bottom edge lay flat as I sewed.

Turn bunny inside out again and stitch up the remaining open edge, reinforcing stitching at the end.

For an extra bit of psychedelic flare I made a yo-yo and hand-stitched this to the back in place of a tail.


To make your own yo-yo's (hand sewing required):
-Cut a circle two inches across, stitch a running stitch all the way around the outside of the circle starting from the inside with a knotted thread, stitch 1/8 in or thereabouts from the edge.
-Pull up the threads when you get to the end and knot. You should be left with a circular puff of fabric.
Turn it over and hand-stitch it to the back of the Egg cosy, in place of a tail.

Add a cute face or just leave it plain, make them your own with your fave Reuse Centre fabric finds.

Happy Easter

- Emma (Volunteer)


Friday, 15 March 2013

How to lose 20 pounds and get organized

Spring is (hopefully) on its way and with that comes spring cleaning! So how can you lose 20 pounds of extra, no longer used stuff in your house and get organized? Well the first step is decluttering.

We found a number of websites with tips on decluttering you space. Here are some of your favourite ideas summarized below.

15 Great Decluttering Tips, suggests implementing a clothing rule: if you haven’t worn an item in 6 months, sell or donate it. Another idea is creating a one-year box. Take all your items that you haven't used in a while and don't know if you should get rid of and put them in a box, seal it and date it for 1 year in the future. When the date comes, and you still haven't opened it, donate the box.
Impulse buyer? Keep a list labelled “Don’t Need It – Don’t Want It.” When you run across some kind of item you crave, note it down on the list. This will slow you down long enough to reconsider.

Apartmenttherapy.com also has some great decluttering tips in its piece Pro-organizer tips: What not to do when decluttering your home. The article suggests organizing items before purchasing storage pieces and supplies so that you will know exactly what you need for each space. How about making decluttering not just a spring activity but a daily or weekly one? Another Apartmenttherapy.com post 5 Strategies for Decluttering recommends doing a little bit of decluttering each day. Try to take 10-15 minutes in your day to focus on at least one small space or project.

Once you have decluttered, give your unwanted, in good condition items a second life by donating them to an organization or charity. Check out the Reuse Centre's list of acceptable items or the Reuse Directory to learn where you can donate them.

So now that you have decluttered, here are some ideas on how to get organized:

  • Plastic storage bins are ideal for organizing as they are durable and come in a variety of sizes. Larger containers can be used to store seasonal decorations and smaller containers are perfect for organizing craft supplies.
 

  • Sort small household items into shoeboxes. They can be decorated with paper to match any room and are easily stackable in a closet or corner.


  • Coffee tins are another neat way to keep all of your smaller items organized. Perfect for storing pens, pencils and other school supplies and they can be decorated too!


  • Wicker baskets are stylish ways to keep things tidy and organized. Baskets are great for storing magazines, toys, or blankets.


This is what we gathered through our research. Hopefully they will help you through your spring cleaning. If you have any tips, suggestions or helpful hints, please share them below!!

- Hayley (Staff) and Vanessa (Volunteer)

Friday, 1 March 2013

7 Ways to Reuse Magazines

If you've been to the Reuse Centre, you know we have a huge collection of National Geographic magazines, so we decided to brainstorm and research interesting ways to reuse them. If you don't have any old magazines sitting around your home, stop by and grab some from us to get started on these great reuse projects!

1. Reuse Decor - The beautiful and inspiring pictures found in National Geographic magazines can become treasured pieces of art in your home. Find an old frame (we have some of those too!), cut out a favourite picture and place it in the frame. It's as easy as that!

2. Magazine Coasters - Want to show off your DIY skills next time you have company over? Make these cool magazine coasters and put them out at your next party.


3. Gift Wrap - Have you found the perfect gift for someone special but can't quite decide how to wrap it? Come to the Reuse Centre and we will help you find a National Geographic magazine from the month and year you are looking for. Whether you're celebrating a birthday, anniversary, or other occasion, a National Geographic from the special date will make great gift wrap... and you can include the rest of the magazine in the gift for the recipient to flip through. If you're feeling extra adventurous, you can make your own bow too!


4. Magazine Bowls - Jewellery, accessories, and home decor made from old magazines have become quite popular recently. Instead of buying one of these bowls from a store, save your money (and some trees!) and make your own.


5. History Lesson - Old National Geographic magazines can make great resources for teachers. The magazine was first published in 1888 and has been providing readers with a wealth of information since then. One of the oldest issues we found at the Reuse Centre recently was from June of 1957. Bringing a magazine like this into a classroom could be invaluable for teaching students about the history of our world, how it has changed, and how it has stayed the same ()
 
6. Magazine Magnets - This project will require you to purchase a couple extra supplies, but could result in a cute and thoughtful homemade gift... or you could just keep them all for yourself! Grab your crafting supplies and some interesting pictures from an old magazine and have fun making your own unique magnets!


7. Travel Inspirations - Who would have guessed that the very same National Geographic issue mentioned above from June, 1957 would have a 21-page story (complete with several full-page pictures) about the beautiful Maldives islands. A dream destination for many even today, the author of this article talks about how long he has waited to visit this paradise. The amazing pictures and incredible stories about destinations around the world could inspire you to take your next vacation now!


- Marissa (Volunteer)