Monday, 17 December 2018

Festive and Holiday Vase Decor

The Reuse Centre recently hosted a drop-in crafting activity where participants made Winter Scene Tealight Holders. The pieces of art that were created during this session were stunning, and we just couldn't resist sharing them with you.

Most participants opted to stick to the original project, and designed their own tealight holders using decorative beads and ribbon but there were a few people who thought outside the box and used their vase/candle holder to create beautiful winter and holiday scenes, sans tealight. Here were some of the creations.

Photo Credit: Tessa M.

Photo Credit: Tessa M.

 Photo Credit: Vanessa

Photo Credit: Vanessa


Want to create your own festive vase for this holiday season? Here's a quick tutorial to get you started. One added bonus, all of these items are available at the Reuse Centre.

Materials
  • Glass vase, candle holder, or other type of glass jar
  • Table salt
  • Small holiday or winter figurines and ornaments
  • Artificial greenery or floral type material 
  • Ribbon 
  • Glue gun and glue sticks 
  • Any other accoutrements that you like (i.e. sequins, bells, glitter, beads etc.)

Instructions

1. Ensure that your vase or container is clean. Once you start to add items, it will be difficult to wipe off dust or fingerprints.

2. Fill the bottom of your container with salt. A 1-2 inch layer should be enough, but you can add more or less, depending on how much "snow" you want in your scene.

3. Once you've added your "snow", start creating your winter/holiday scene. I'd recommend placing larger items in first and then working the smaller items around them. Try experimenting by adding some glitter to your snow. And don't be afraid to trim down your artificial greenery and floral material to create little trees or shrubs. A great part of this project is that you can put items in and take them out relatively easily, so you can create exactly what you're envisioning.

4. When you've finished creating your scene inside of your container, try adding some ribbon or other items to the outside of your container. Just a word of caution, adding too much to the outside may make it difficult to see your scene on the inside. Pay attention to what your scene looks like from eye level and not just the top.

Taaa-Daaah! You're all finished!

Interested in attending our next crafting session? Be sure to follow us on Facebook to find out about any upcoming drop-in crafting activities and workshops.

- Vanessa (Staff)


Tuesday, 6 November 2018

DIY Tea Cup Candles

I was recently enlisted to help plan a bridal shower and the theme was a high tea party. As with most parties, I wanted to provide some kind of favour or keepsake to thank guests for attending.

I've seen tea cup candles in stores and craft fairs over the last few years and always thought they were pretty. When it came time to come up with an idea of what I could give guests I thought, why not try to create my own tea cup candle. It turns out, that they're pretty easy to make. I was able to find almost all my supplies at the Reuse Centre. The only thing that I couldn't find there was a tea cup, but I manged to find one at a local Goodwill store. Yay! A 100% reused project.

Materials
  • Wax (any of these will work): old candles in similar colours, with wicks removed; paraffin wax; beeswax; soy wax
  • Ceramic/porcelain/china tea cups
  • Candle wicks with metal base
  • Skewers
  • Knife
  • Cutting board
  • Small metal coffee can  
  • Pot 
  • Water
  • Oven mitts or other heat resistant gloves


Directions:

1. Chop your old candles or wax that you're using into small bits. This will make it easier and quicker to melt the wax.


2. Place your chopped up wax in your metal coffee can.

3. Submerse the can in a pot of water. The water should be about halfway up the side of the coffee can. Start to heat the water on medium heat. The water should be hot but not boiling. Occasionally stir the wax as it melts.


4. While your wax is melting, prepare your tea cups. Place one wick in each cup with the metal base resting at the bottom of the cup.

5. Place your skewer, perpendicular, on top of the tea cup and rest the excess wick on top of it. This will ensure that the wick stays upright when you pour the wax in.

6. Once the wax is fully melted, remove the pot from the heat and carefully remove the coffee can from the water using your oven mitts/gloves.

7. Pour the melted wax into each tea cup about 3/4 full. Adjust the wick, if needed, to ensure that it is upright and straight.


8. Allow the wax to completely cool, remove the skewer, and trim the wick to about 2cm above the wax.

Presto! You have a cute tea cup candle.


The guests loved the candles and an added bonus of creating them was that they doubled as decor during the party. These candles would also make a great gift for lots of other occasions. Happy crafting!

- Vanessa (Staff)
All Photos provided by Vanessa

Tuesday, 11 September 2018

5 Tips and Tricks Before You Thrift

Are you tired of your style? Would you prefer a more sustainable way to shop? Are your funds limited? If you answered yes to any or all of these questions, you're in luck! Thrift shopping is the answer to your fashion dilemma! However, before you go rushing to the nearest thrift store, here are five tips and tricks to guide you through thrift shopping.


                                                         Photo: Cindy Caturao


1. Set a Budget

Limit your spending! With prices reduced to almost half, sometimes even three quarters of the original price, it's quite easy to get carried away and buy clothes and furniture that you don't necessarily need. Ask yourself: Do I need it? Will I actually use it? Is it worth it? Setting a budget will help you to not only narrow down the things that you need but also keep your spending in check. 

2. Shop Around 

Edmonton offers a variety of consignment boutiques, thrift shops, and many second-hand stores. Various neighborhoods will also carry different items. I suggest going to multiple locations for an eclectic mix to shop from.

3. Sign up for memberships 

I understand, there is nothing more annoying than constantly receiving promotions, newsletters and just overall spam mail from different companies but sometimes it's worth it to subscribe. Occasionally, places such as Goodwill and Value Village will email members 40-50% off coupons. 

4. Shop with an open mind

Refrain from sticking to one area of the store. The beauty of thrift shopping is that most of the time, the items that you find are from the most unexpected sections of the store. Keep your options and selections ample and explore different areas of the store outside of your comfort zone!

5. D.I.Y.

Occasionally, you may find a garment that's not your ideal size or style. Making some quick and easy alterations allows you to see beyond the original purpose of the item. It opens up the potential and possibilities to reuse and repurpose garments. 

Thrift shopping is a sustainable way to dress without breaking the bank. It promotes reusing and repurposing garments that might otherwise end up in landfill creating more waste. Lessen your carbon footprint and shop at a thrift store. You never know what you might find!


                                                                                       - Cindy (Volunteer)

Wednesday, 5 September 2018

Fun Crafts from Knitting (or Crochet!) Scraps

Knitting and crochet both have a lot of benefits as autumn craft activities: they can be enjoyed alone or with friends; they're portable for holidays and road trips; and kids can join in the fun (particularly with techniques like arm knitting or finger crochet). These pastimes are also great from a sustainability standpoint, as needles/hooks are durable and rarely require replacement and yarn can be purchased (or found at the Reuse Centre) in a variety of eco-friendly fibres.

One of the reuse challenges that I encountered when I started crocheting regularly was what to do with the many scraps of yarn that I accumulated from different projects. I found that the easiest solution was to wind each piece into a small roll and store them in a mason jar or on an empty paper towel tube. Here are 3 fun ideas for how you can put those scraps to use.

1) Ornament or Hanging Mobile

Yarn scraps can be wrapped around styrofoam balls to make individual ornaments or a stunning hanging mobile. This project provides the opportunity to be creative with color, size and arrangement, making the finished project suitable for anywhere in the home, in any season.

2) Wall Hanging

This is another versatile home decor project, requiring yarn scraps and a piece of dowel. Check out A Pretty Fix for a great example. Different colors and textures of yarn can be used in combination and the dowel could be replaced with a branch or piece of pipe for a more rustic or modern look, respectively.

3) Gift Wrap

Although this example from It Happens in a Blink is for a Christmas present, the idea is great for any time of year. Alternatives to conventional gift wrap are important from a sustainability perspective, plus a fun and personalized package is sure to bring a smile to the recipient's face!


-Karlene (Volunteer)

Thursday, 16 August 2018

How to Throw a Waste-Free Party

Summer is full of weekend get togethers and backyard barbeques. All these parties can create a lot of excess waste and garbage. But it doesn’t have to be that way. There are many ways to reduce or eliminate waste at your next summer party. Here are some tips.

Use reusable plates, cutlery and napkins 
    • While disposable dinnerware may be tempting to use for convenience, it creates a lot of extra garbage. Most of these items are plastic, Styrofoam, or coated with a water-resistant finish so they are not recyclable. If you must use disposable items try to find ones that are labelled as Certified Compostable
    • An easy alternative to disposable plates, cups, and cutlery is to use your own dishes and flatware. What’s that? You don’t have enough? Ask your guests to bring some. Having an assortment of dishes creates an eclectic fun atmosphere for the party. 
    • Along the same idea of using reusable dinnerware, the same applies to drinkware. Skip cans and bottles for beverages and serve drinks from pitchers or jugs. This will prevent having to recycle empty bottles and cans. It will also allow guests to have as much or as little water/juice as they want; they aren’t stuck with finishing the entire bottle or can or having to dump out the leftovers. Remember to use reusable cups and glasses too! 
    • Worried about washing all those dishes? Most of the individual plates, glasses, and cutlery can go in the dishwasher. That just leaves the serving dishes, which will have to be washed by hand. This is not such a terrible thing! Recruit a couple of your guests to stay later and help. This is a great opportunity to reflect on the party and have one-on-one conversations with guests that you may not have had a chance to chat with earlier. 
Ask guests to RSVP and confirm numbers
    • Knowing how many people to expect is important in determining how much food and beverage is needed and reduces the amount of leftovers after the party. Whether you send out a formal invite or a casual instant message, try to get an accurate number of the guests you are expecting. 
    • For quantity planning, check out the spruce for tips on planning quantities of food needed.
Have guests bring reusable containers for leftovers, or try a potluck, instead
    • This will reduce the amount of food that is wasted. Guests can take home a little bit of everything and have lunch or dinner for the next day. If you choose potluck style, then guests can take home their individual leftovers and you aren’t stuck with all of the remaining food.

Skip paper invitations
    • There are lots of great websites where you can create custom invitations for your party and send them via email or text message. These sites allow you track RSVPs, set up potluck instructions, plus loads of other additional features. Punchbowl is one that I like. It’s very user friendly and offers a variety of fun templates for any theme.

Serve seasonal, minimally-packaged bulk food
    • Purchase seasonal local produce and prepare and cut it yourself. This will reduce a lot of plastic waste from pre-packaged fruit and vegetable trays.
    • Purchase deli meat, olives, nuts, and other snacks in bulk. This will not only save you money but will minimize having to toss empty bags and packaging.

Do you have any other ideas for hosting a waste-free party? Comment below with your thoughts and ideas.

Vanessa (Staff)

Thursday, 9 August 2018

Making Paper: A Kid-Friendly Crafting Activity

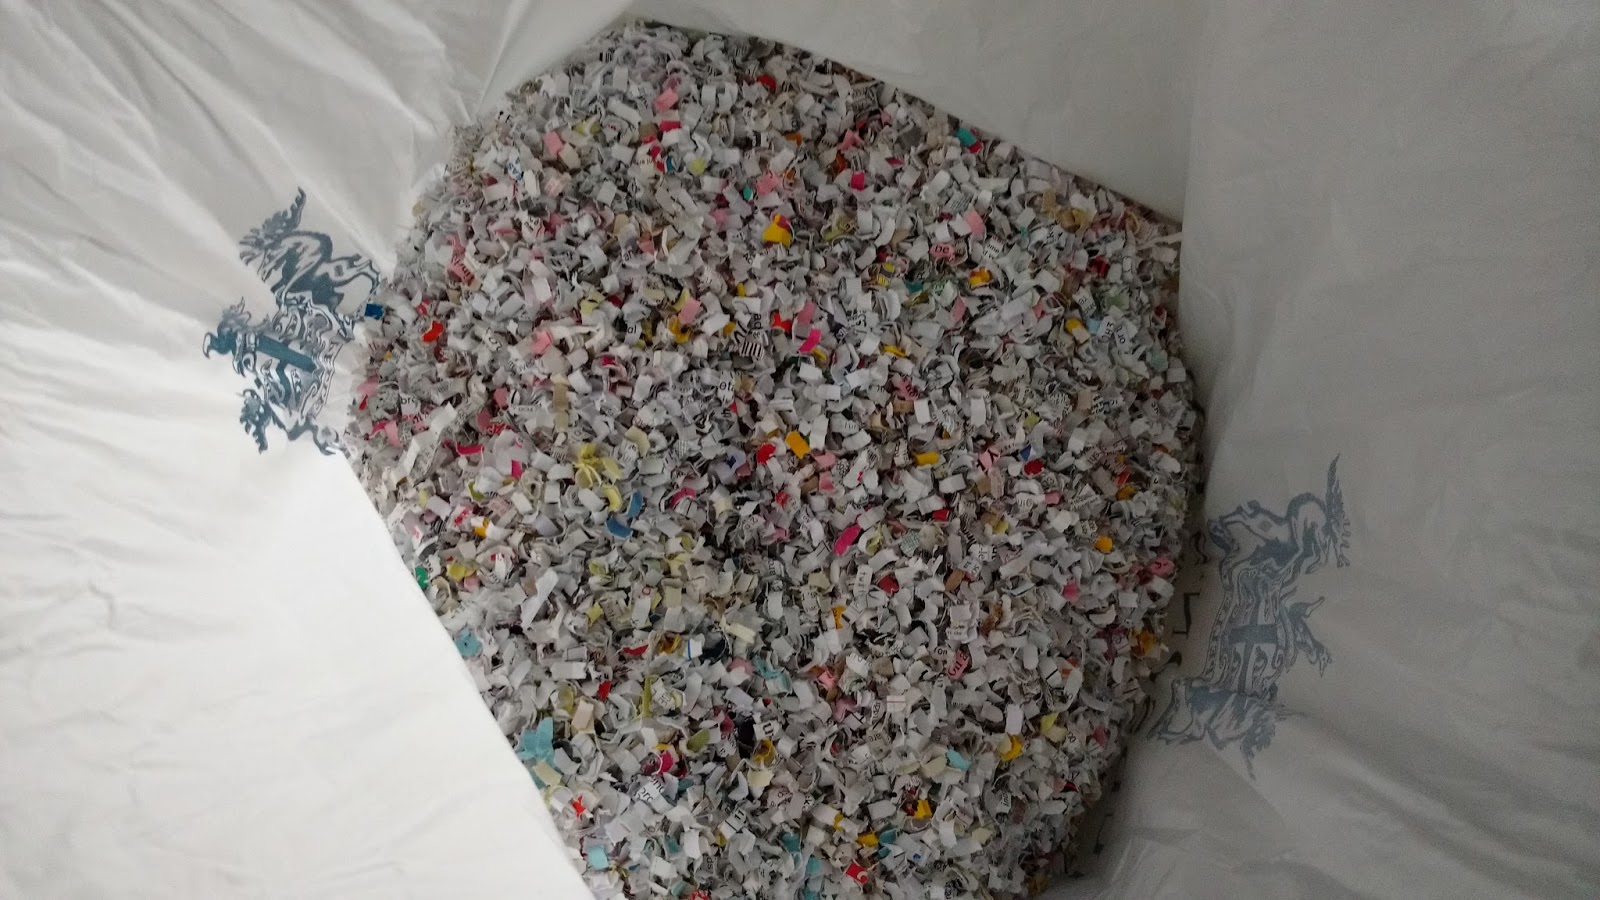
After a mad session of decluttering and office organization, what can you do with piles of shredded paper? Sure, you can recycle it, but as with anything, repurposing it can extend its useful life while creating something new (to you) and fresh.

An added bonus to making paper with a toddler is the messiness of it all. Kids get free range to go elbow-deep in a tub of gooey paper pulp, feeling the messy texture between their little fingers. It's a perfect afternoon activity.

Materials:
  • Shredded paper
  • Water
  • Wood frame
  • Screen material
  • Duct tape
  • Blender
  • Felt or similar material
  • Glitter, leaves, or any type of embellishment you'd like to add

A big ol' bag of shredded office paper. Photo: Ellen Hanna
Start with a powerful blender or food processor and a few handfuls of shredded paper. Add any amount of water (you'll squeeze all the excess water out so you don't need to measure) and blend away!

Pulp A.K.A. goop. Photo: Ellen Hanna
Meanwhile, you'll need to create or repurpose a wood frame. I used an old painting canvas. I ripped the used canvas portion off (remember--you can use the painted or virgin canvas without the frame so don't toss it!) and duct taped some screen material to the frame. If you have a strong stapler or staple gun, you can use that. Try to source a very fine mesh screen or your paper will be chunky. Screening is usually sold in larger quantities than you need, so look for old material you can reuse for this.

Photo: Ellen Hanna
Photo: Ellen Hanna
Photo: Ellen Hanna
Depending on where you're doing this activity, you may need a bucket to catch the water that squeezes through the pulp. We were going to let the water drop into the grass but decided instead to press the pulp over our empty sensory bins.

Photo: Ellen Hanna
 Next, spoon, pour, or grab handfuls of goopy pulp and place on the screen of your frame. We tried a paintbrush to spread the pulp but found our little fingers were just as effective. Spread the pulp all the way to the edges of the screen. The thicker your layer of pulp is, the longer it will take to dry and you'll end up with a very thick, rigid  paper. If you want to embellish your paper with glitter, leaves or flower petals, or any other addition, now is the time.

Photo: Ellen Hanna 
A very thick layer of pulp. Photo: Ellen Hanna
Photo: Ellen Hanna
Once your pulp is in place, use a sheet of felt to squeeze the water out while smoothing out the surface. We first tried the leftover piece of canvas but the pulp stuck too much and was pulled up from the screen each time. If you don't have felt on hand you could try another type of fabric, like a towel or old piece of flannel.

Don't rush this step; the fun doesn't end with that squishy pulp! We tried rolling the pulp with a toy rolling pin and the wheels of a tiny truck (neither worked very well but were super fun to do).

A piece of felt can be reused over and over until it's soaking wet. Photo: Ellen Hanna
Ineffective but fun rolling pin. Photo: Ellen Hanna
Also ineffective toy truck wheels. Photo: Ellen Hanna


Once you've removed as much water as possible, gently peel the wet paper away from the screen using your felt as a transfer medium. Then gently peel the paper away from the felt. Since the wet paper can be difficult to relocate, consider a good place for your paper to dry where it won't get ripped or stepped on. Ours was very thick so it took days to dry out.

Pulp waiting to become a sheet of paper. Photo: Ellen Hanna
Once your paper has dried out, it's ready to be used. Ours was a nice chunky and stiff piece with lovely accents of colour--perfect for cards. We used one piece as a Thank You card for a friend and another as a Happy Birthday tag on a present. Next time, I'll add some seeds to the paper so that when we give the paper to friends with a gift, they can then plant it to grow some wildflowers.

Ellen (Volunteer)


Friday, 29 June 2018

From Kitchen Trash to Canada Day Crafts!

Now that the kids are out of school, it's a great time to start on some fun and easy summer crafting! Instead of going out and buying new supplies, why not use items that might be already lying around the house? Reusing is less expensive, more convenient and eco-friendly.

If you're looking for new-to-you craft items, the Reuse Centre is a great place to start as they have an ever-changing selection of arts and crafts supplies at a fantastic price (only $5 for up to 25 kg of materials).

With Canada Day fast approaching, here's a selection of craft ideas that the whole family can enjoy together. Each project takes a common kitchen recyclable that can be found in your blue bag and turns it into something festive!

1. From Soup Can to Wind Sock

This craft is a great example of how a common waste item (like an old soup or vegetable tin) can be upcycled into something celebratory! This activity is also great for using up scraps of coloured paper and ribbon to create the windsock and string, yarn or wire for the hanger loop. Check out Today's Parent for a tutorial.

2. From Glass Jar to Centerpiece

Although the original project calls for mason jars, spray paint and wood cutouts, this project can be made more inexpensively and kid-friendly using empty jars from jams or sauces, acrylic craft paint and a DIY maple leaf made from leftover card stock. Check out Love to Create for details.

3. From Milk Carton to Bird Feeder

This feeder from Today's Parent has been painted to resemble Jellybean Row houses in St. John's, Newfoundland, but you can come up with any design imaginable! Setting up a bird feeder provides a great opportunity to observe and learn about local wildlife and to share why nature and sustainability are so important.

Happy Canada Day!

-Karlene (Volunteer)